Watercress Leaves Socks – free pattern and tutorial
As you’ll know from earlier posts, I love knitting socks, but sometimes it’s not as straightforward as you’d expect. Have you ever had a ball of yarn that just can’t decide what it wants to be? That’s exactly what happened with this particular sock yarn. It turned it’s nose up at every pattern I offered it until I found the Watercress Leaves Pooling Stole pattern by Gladys We on Ravelry. “That’s it!” I exclaimed, and the ball of yarn agreed.
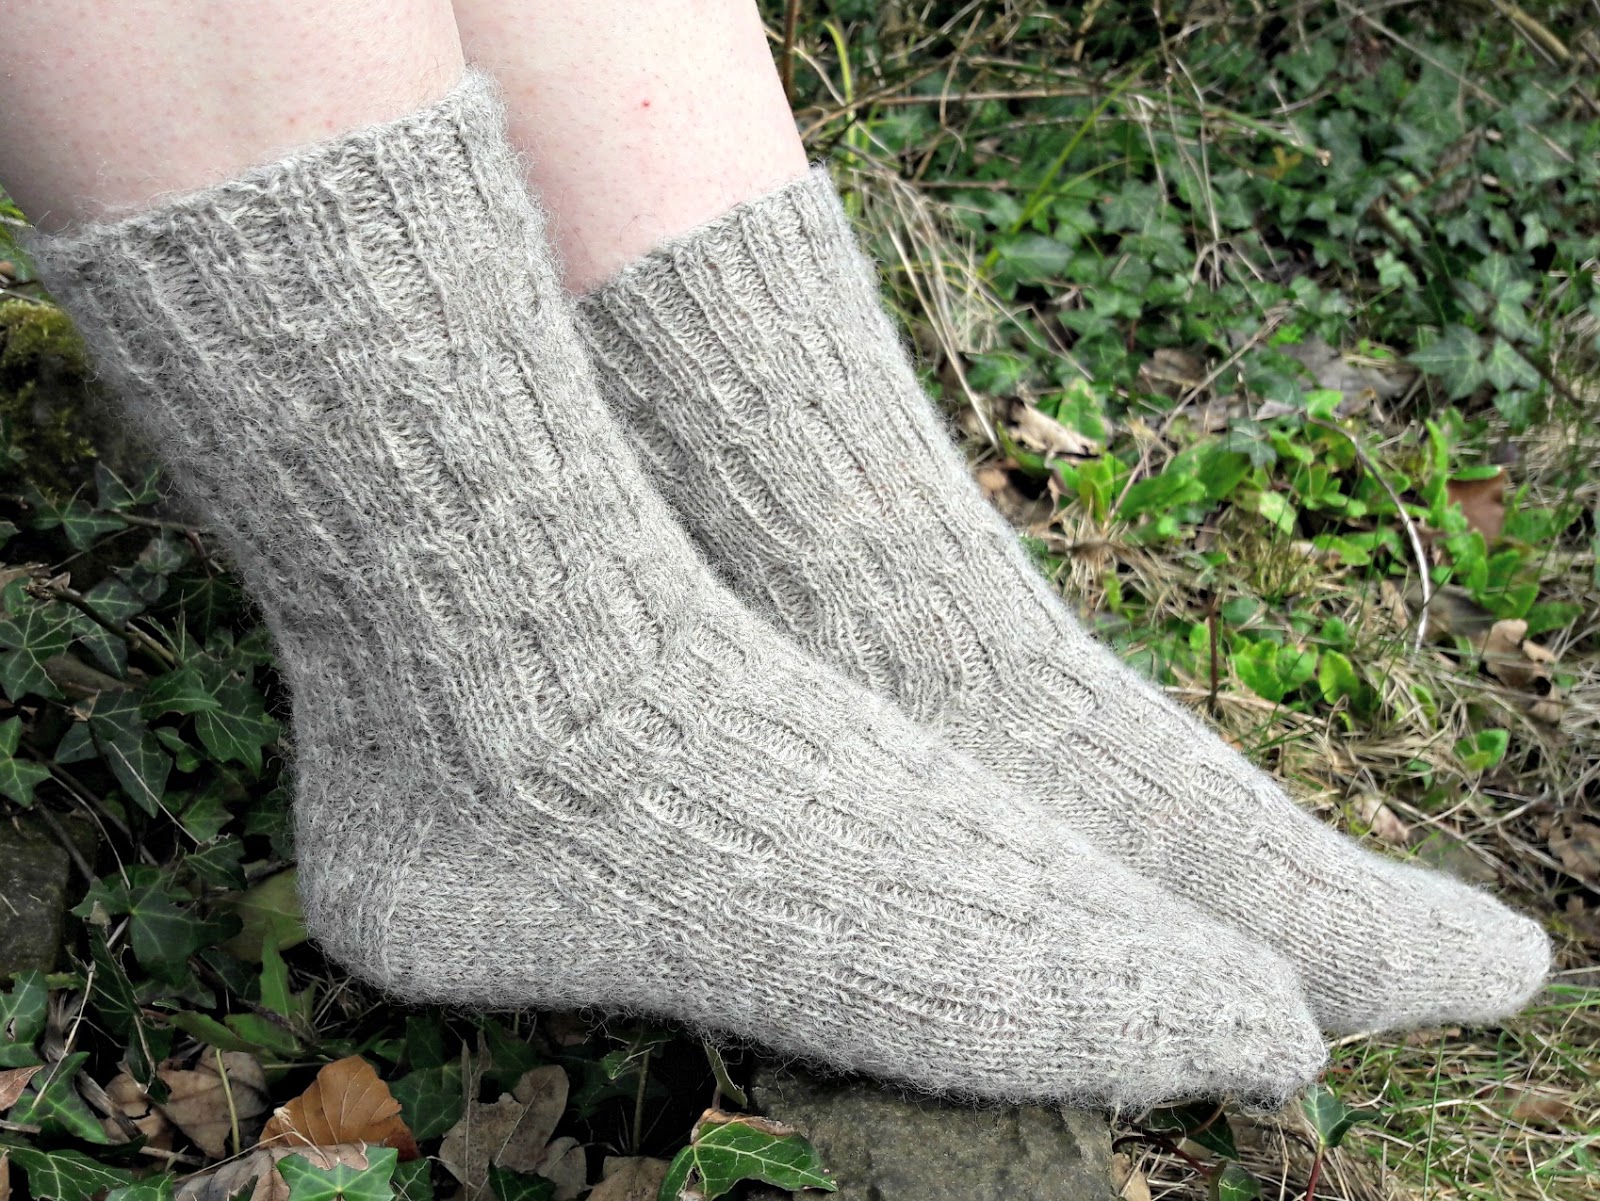
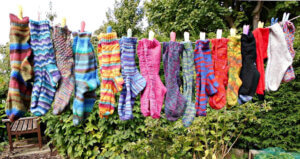
I decided that it shouldn’t be too difficult to turn a shawl pattern into a pair of socks (as you do) so I cast on, and some time later, this was the result.
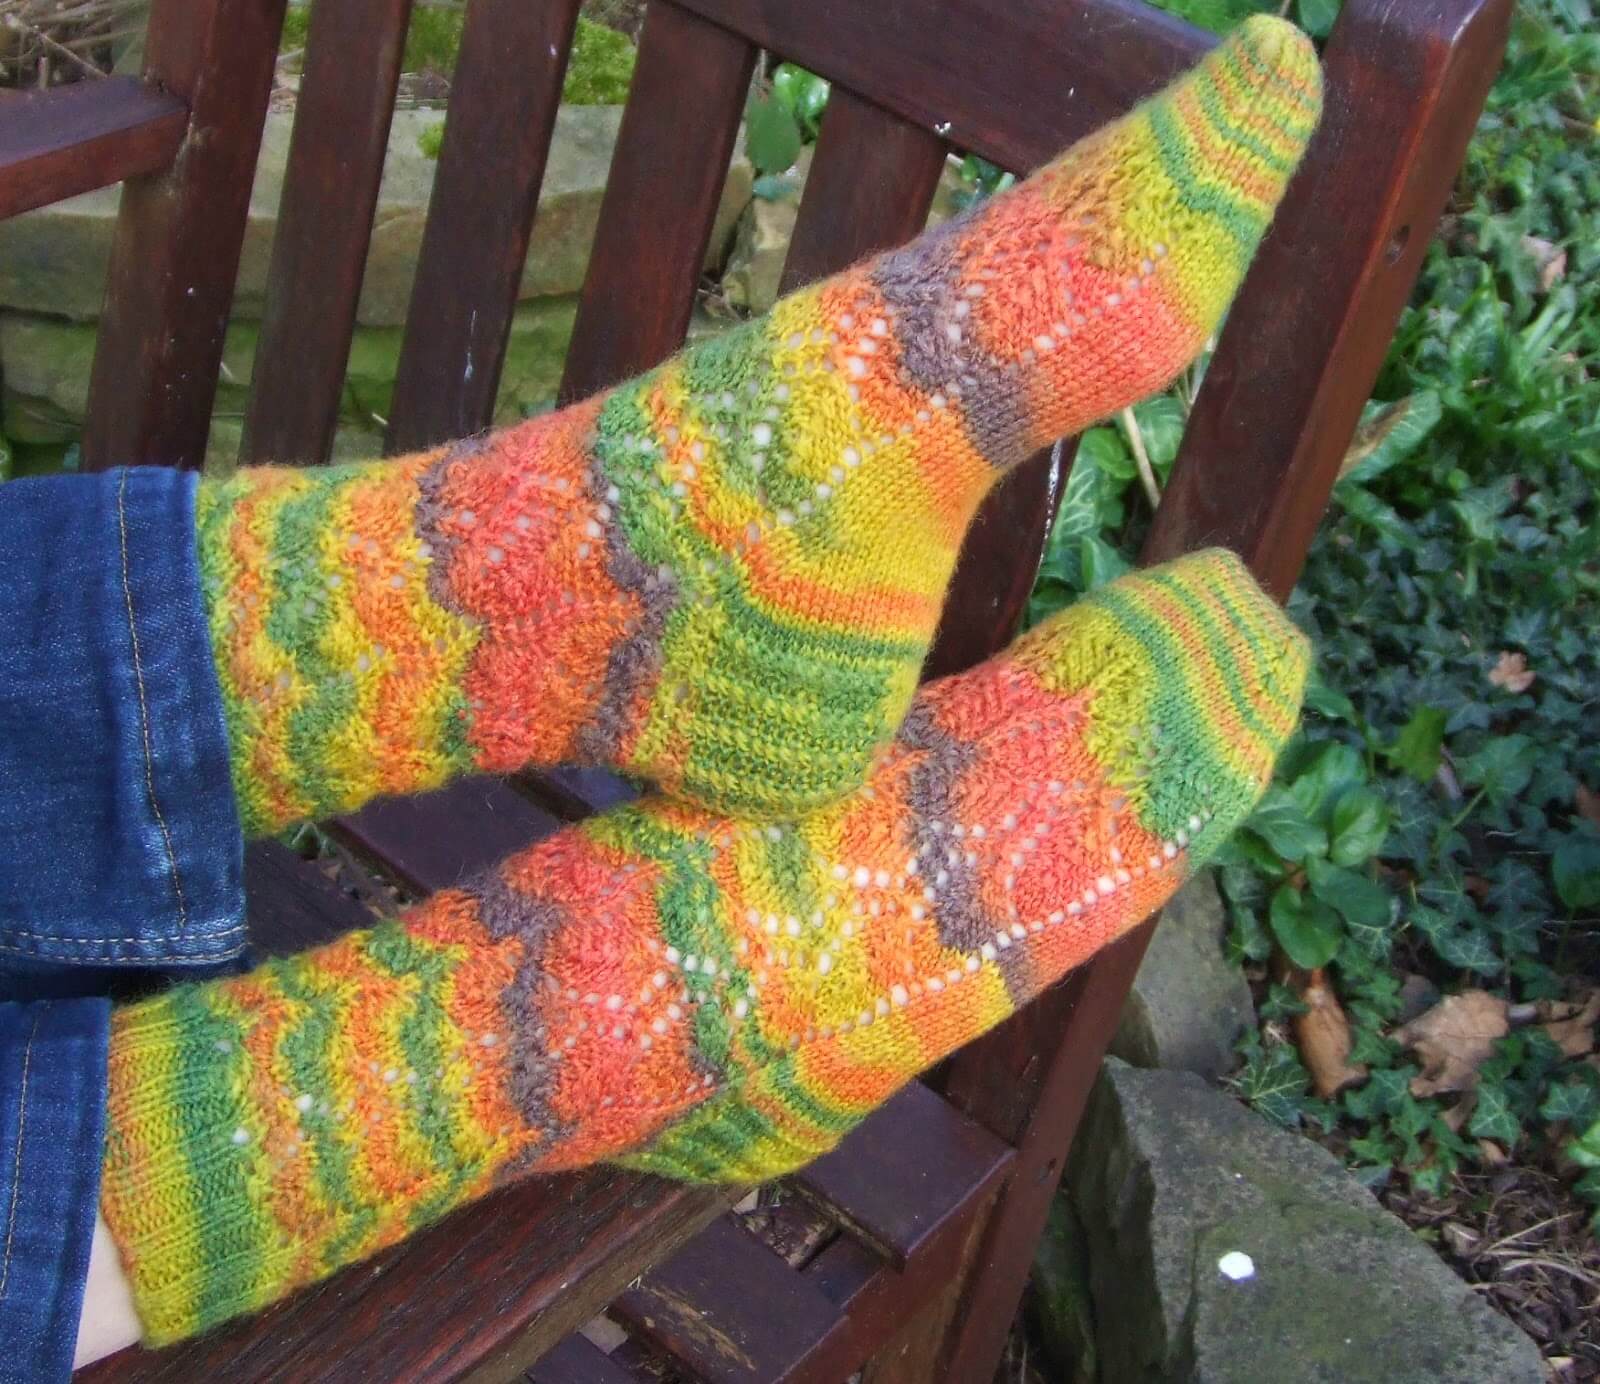
Ooh, I love these socks! I wanted to break up the stripiness of the yarn and although I still have the stripes, they’re now in softer waves rather than solid blocks.
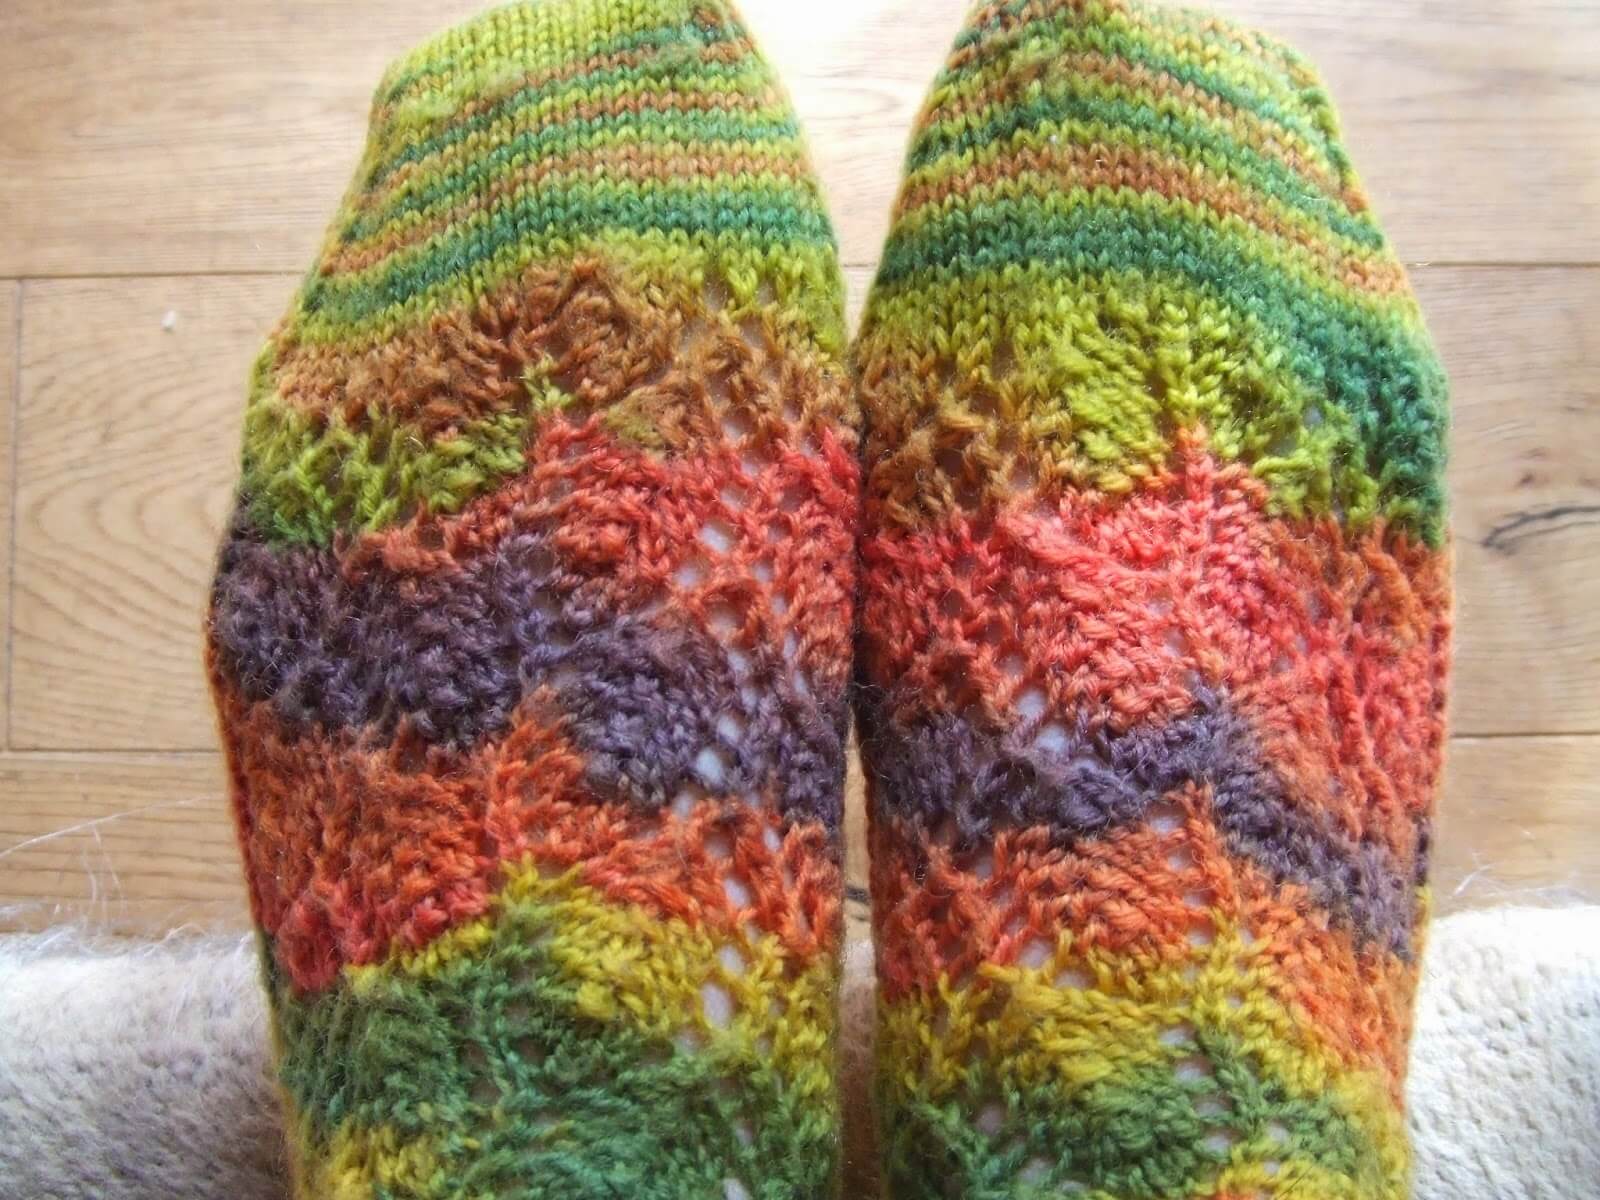
The colours make me think of autumn leaves, and the cross-stitch rib on the heels is a great alternative to the functional but rather boring heel stitch.
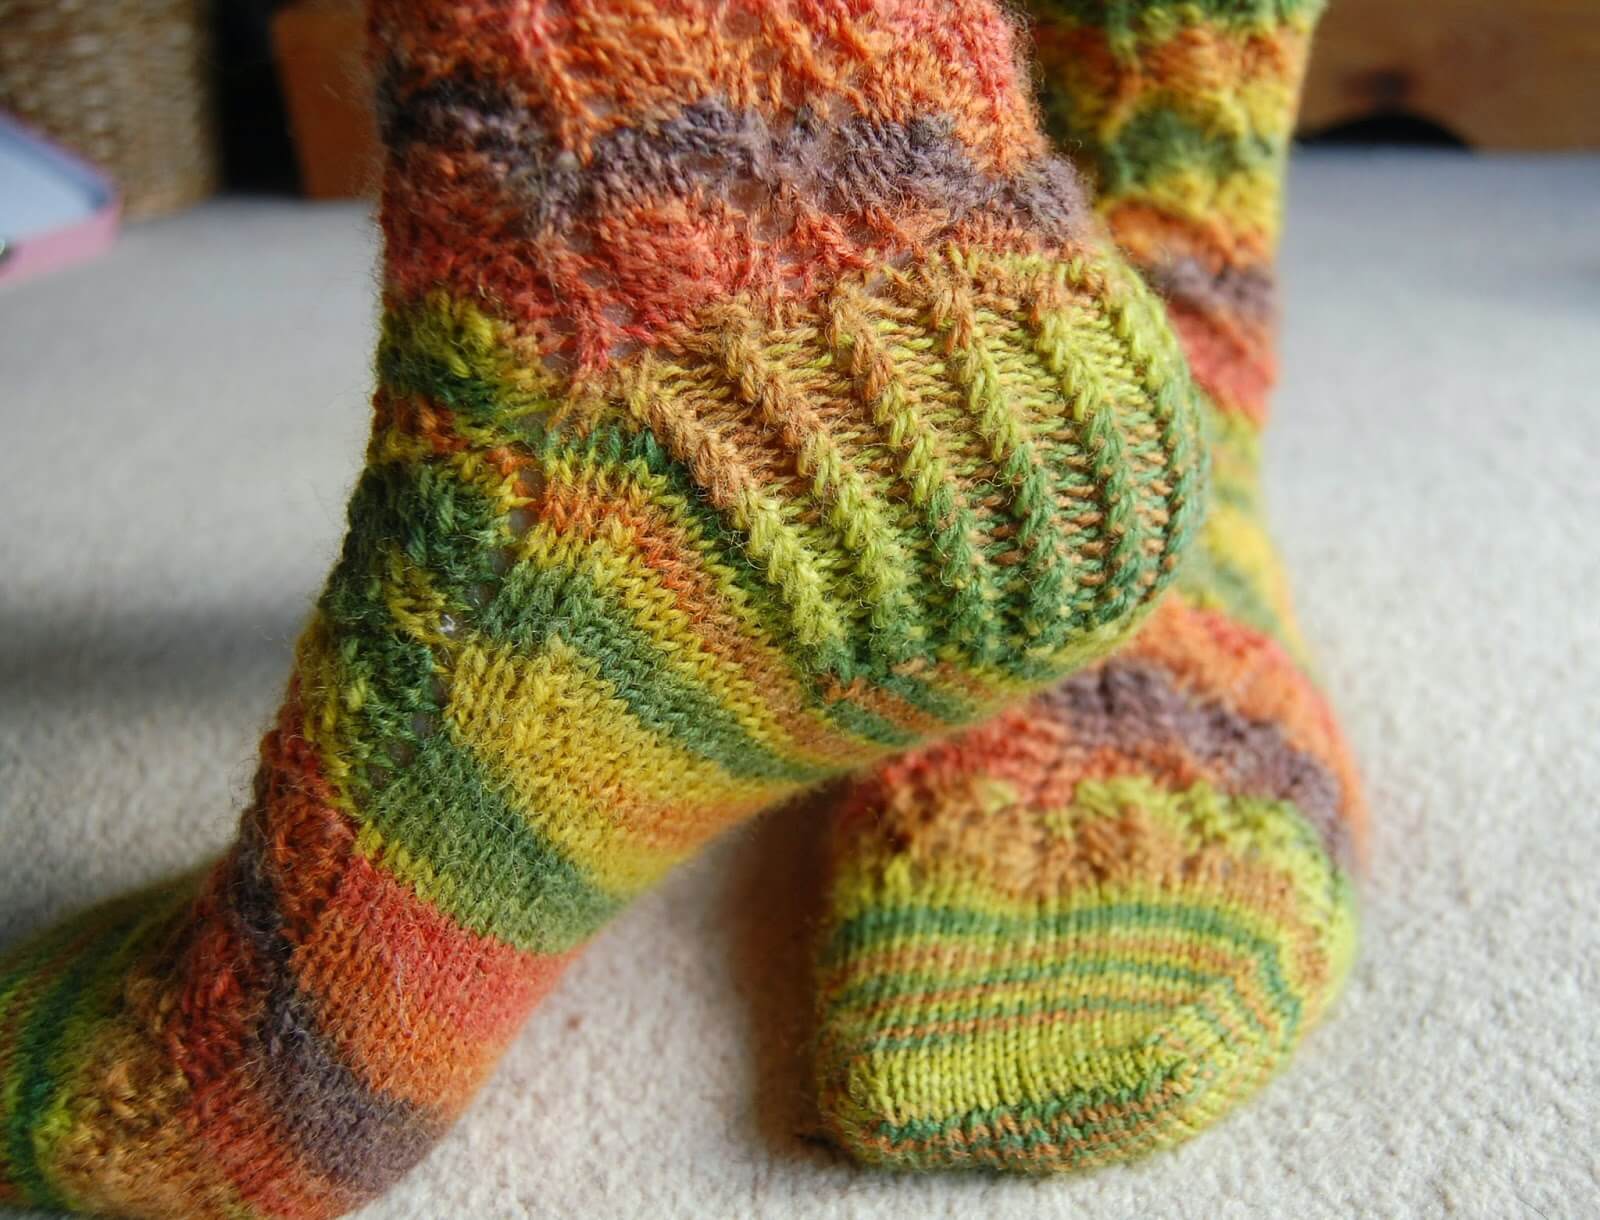
Gladys We has very kindly given me permission to share her lace pattern on which my socks are based, and as no doubt you are waiting, yarn and needles in hand, I won’t waste any more time in presenting …
Watercress Leaves Socks
(you can download a PDF copy of the sock pattern here)
Materials
2.5mm needles – I use a 30cm circular needle but DPNs or magic loop can also be used
100g ball of Zitron Trekking XXL (shade shown is 410)
1 pair double pointed needles (DPNs) size 3.0mm
1 pair double pointed needles (DPNs) size 2.5mm
Watercress Leaves Pooling Stole pattern from Gladys We’s Ravelry page
Note: I cast on using DPNs then change to my circular needle – it’s not easy to cast on using the circular as it’s too small. If you want to use magic loop you will be able to cast on with the larger circular needle. If you use DPNs, you might find it easiest to cast on and work 2 rows before dividing the stitches across the needles.
Heel cross-stitch: This is a simple but effective stitch for sock heels. The stitches twist as if they are cabled but you don’t need a cable needle. This gives a nice “cushiony” feel to the heel. The following pictures are knitted on a sample with a size bigger needles than used for the socks just to show you how the stitch works. In the pattern, this sequence of creating the stitches is called cross2RK as you are crossing two stitches to the right needle.
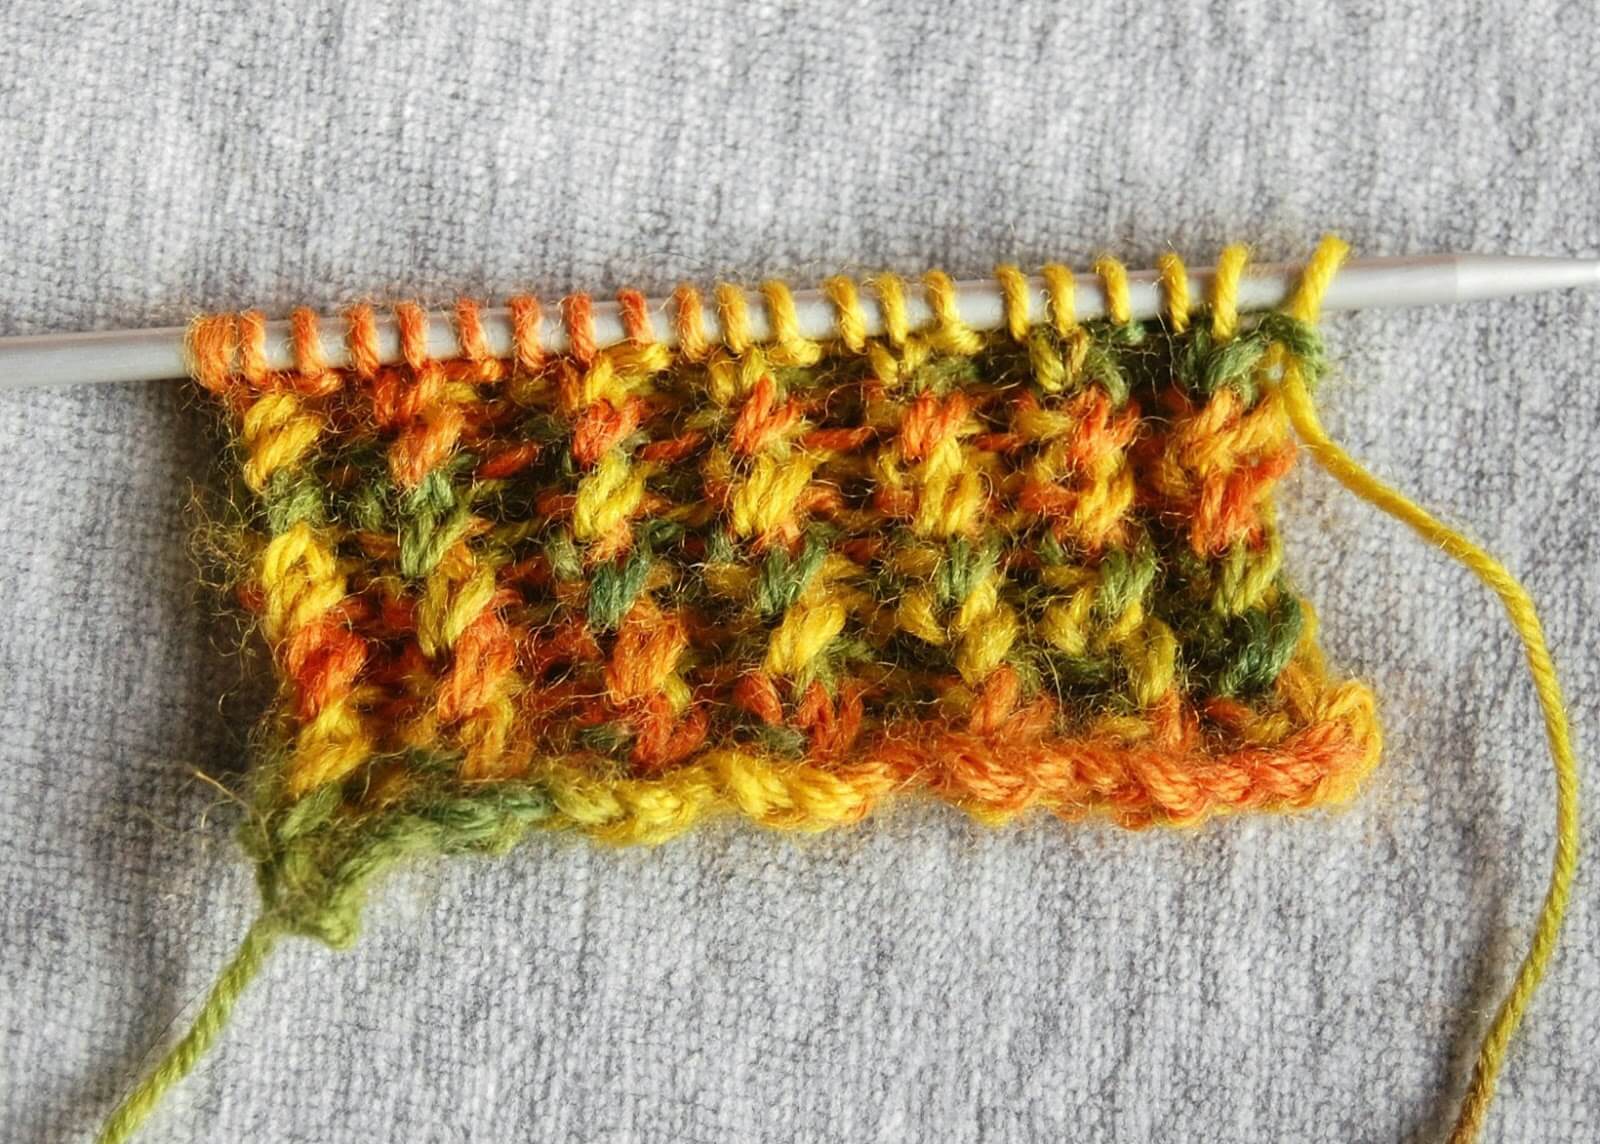
There are five parts to the stitch, which hopefully you can see quite clearly with the orange yarn.
1 Put your right hand needle knit-wise into the second stitch on the left hand needle.
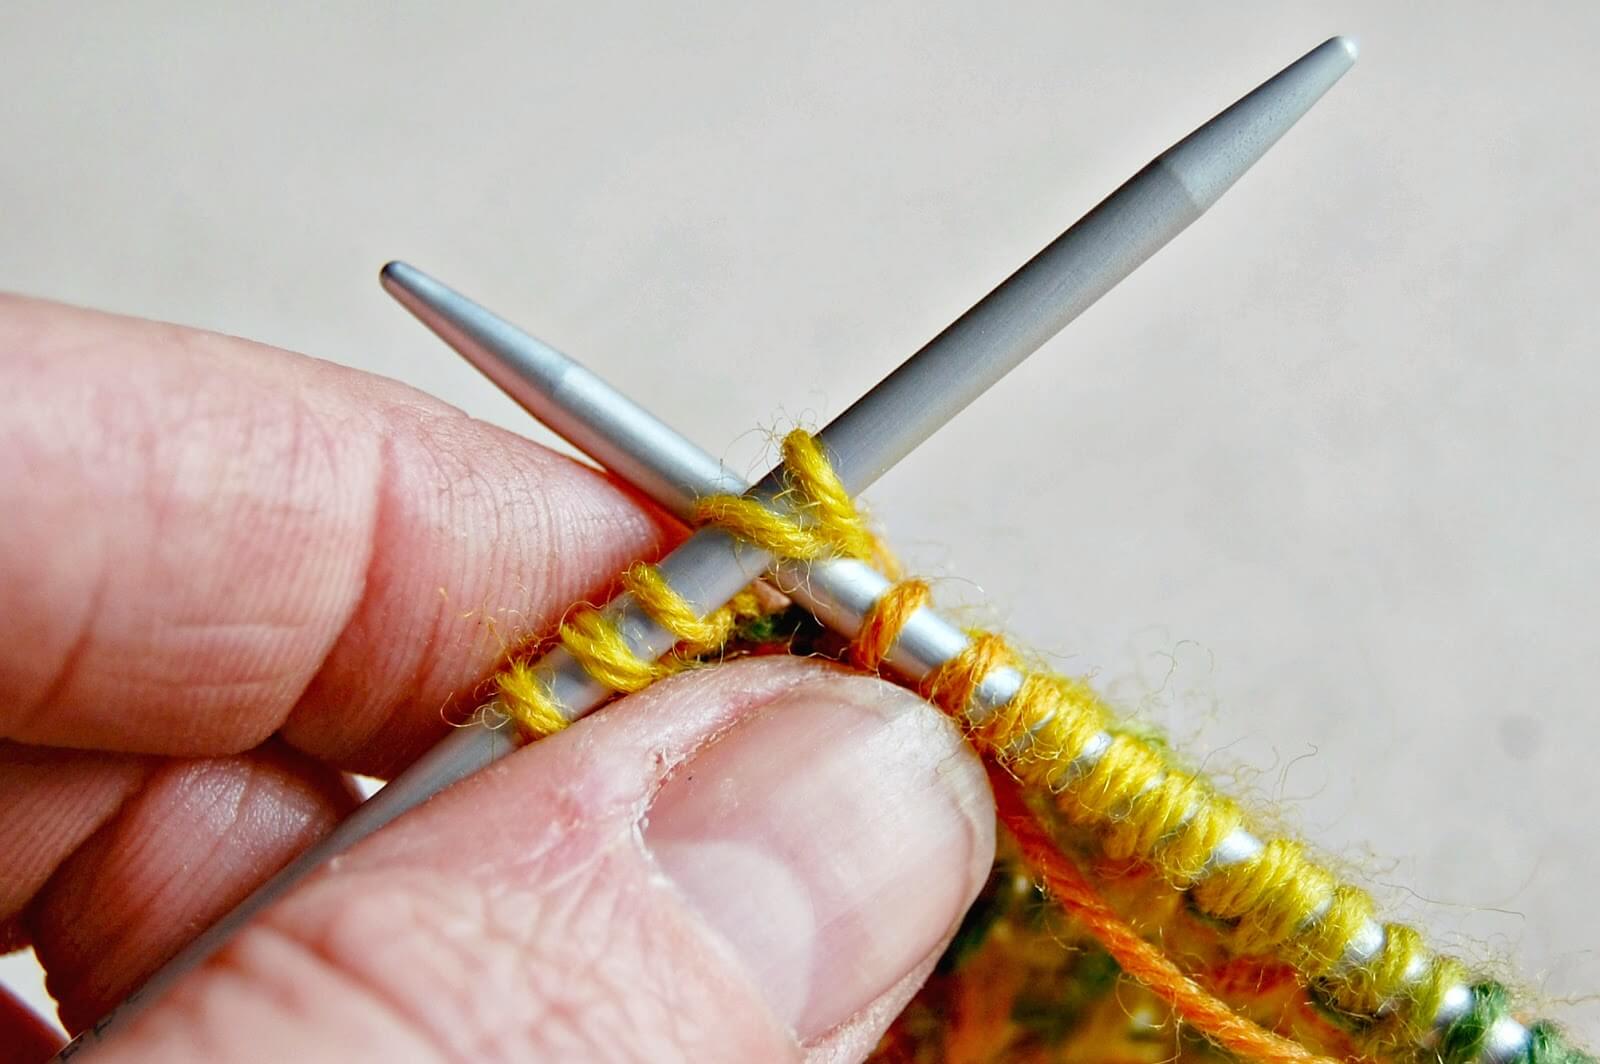
2 Pull the yarn through but don’t try to take the stitch off the needle.
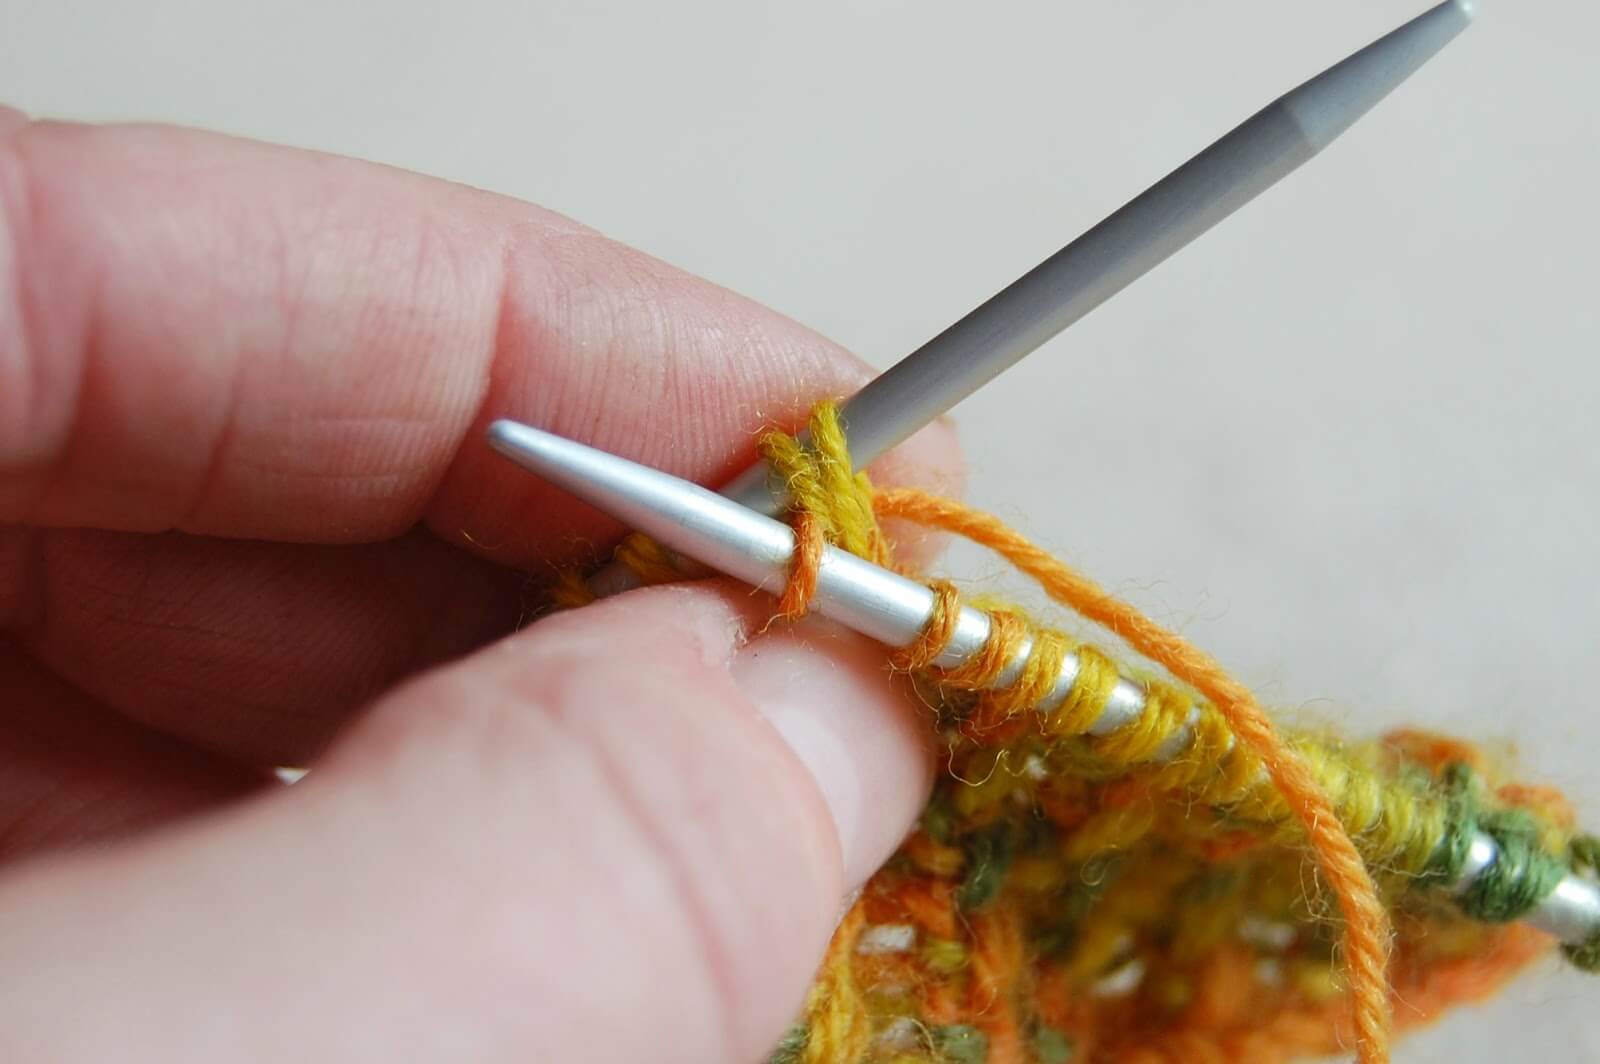
3 Put your right hand needle knit-wise into the first stitch on the left hand needle. You can see how the other stitch pulls across. Don’t let it get too loose, but equally you don’t want it too tight or you won’t be able to move your needle.
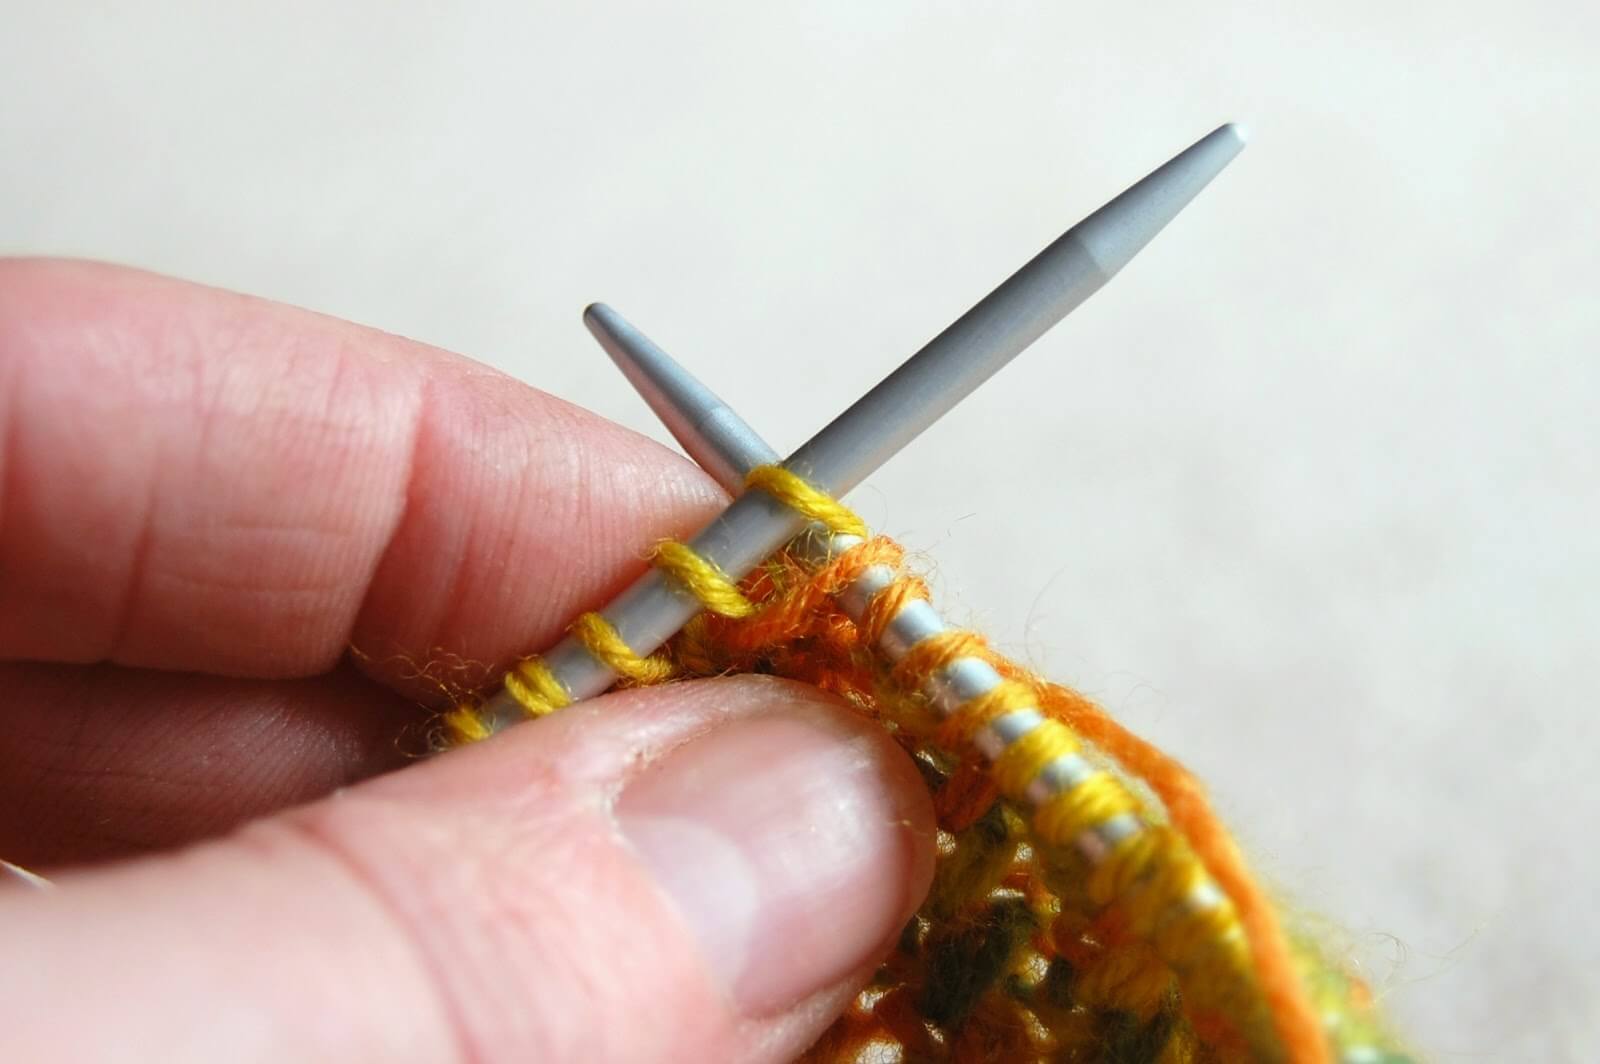
4 Pull the yarn through once again.
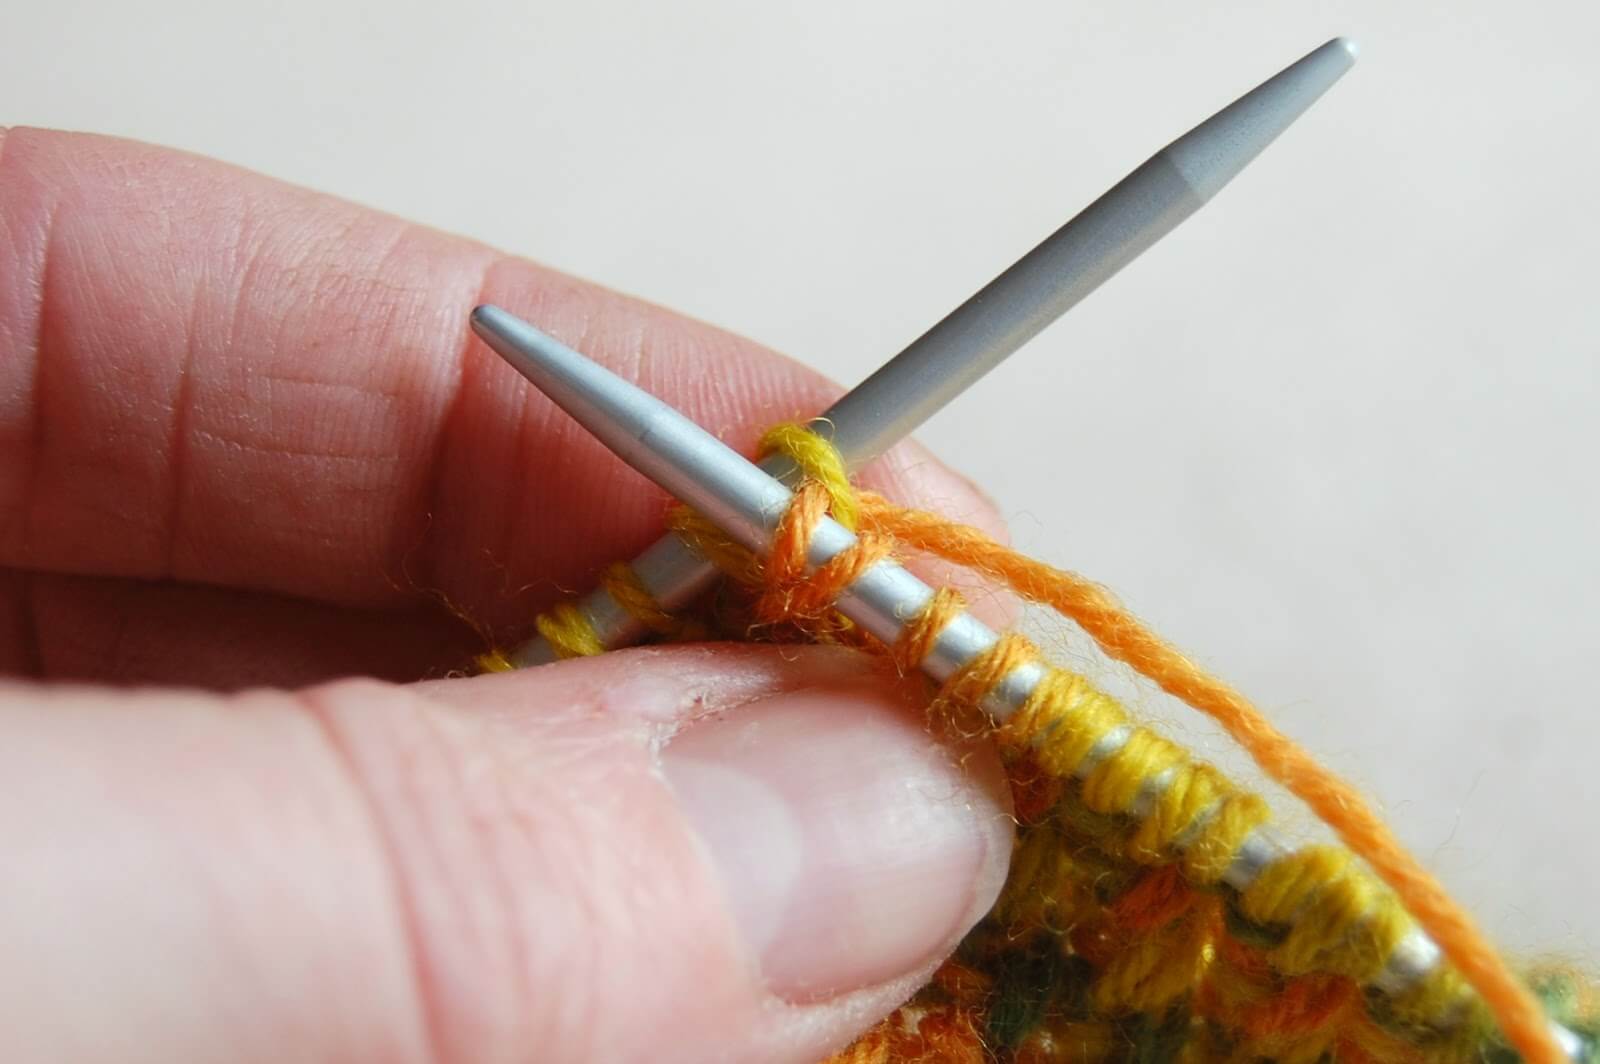
5 Finally, slip both stitches off the needle. You can see in this picture how the stitches have twisted to create the cable.
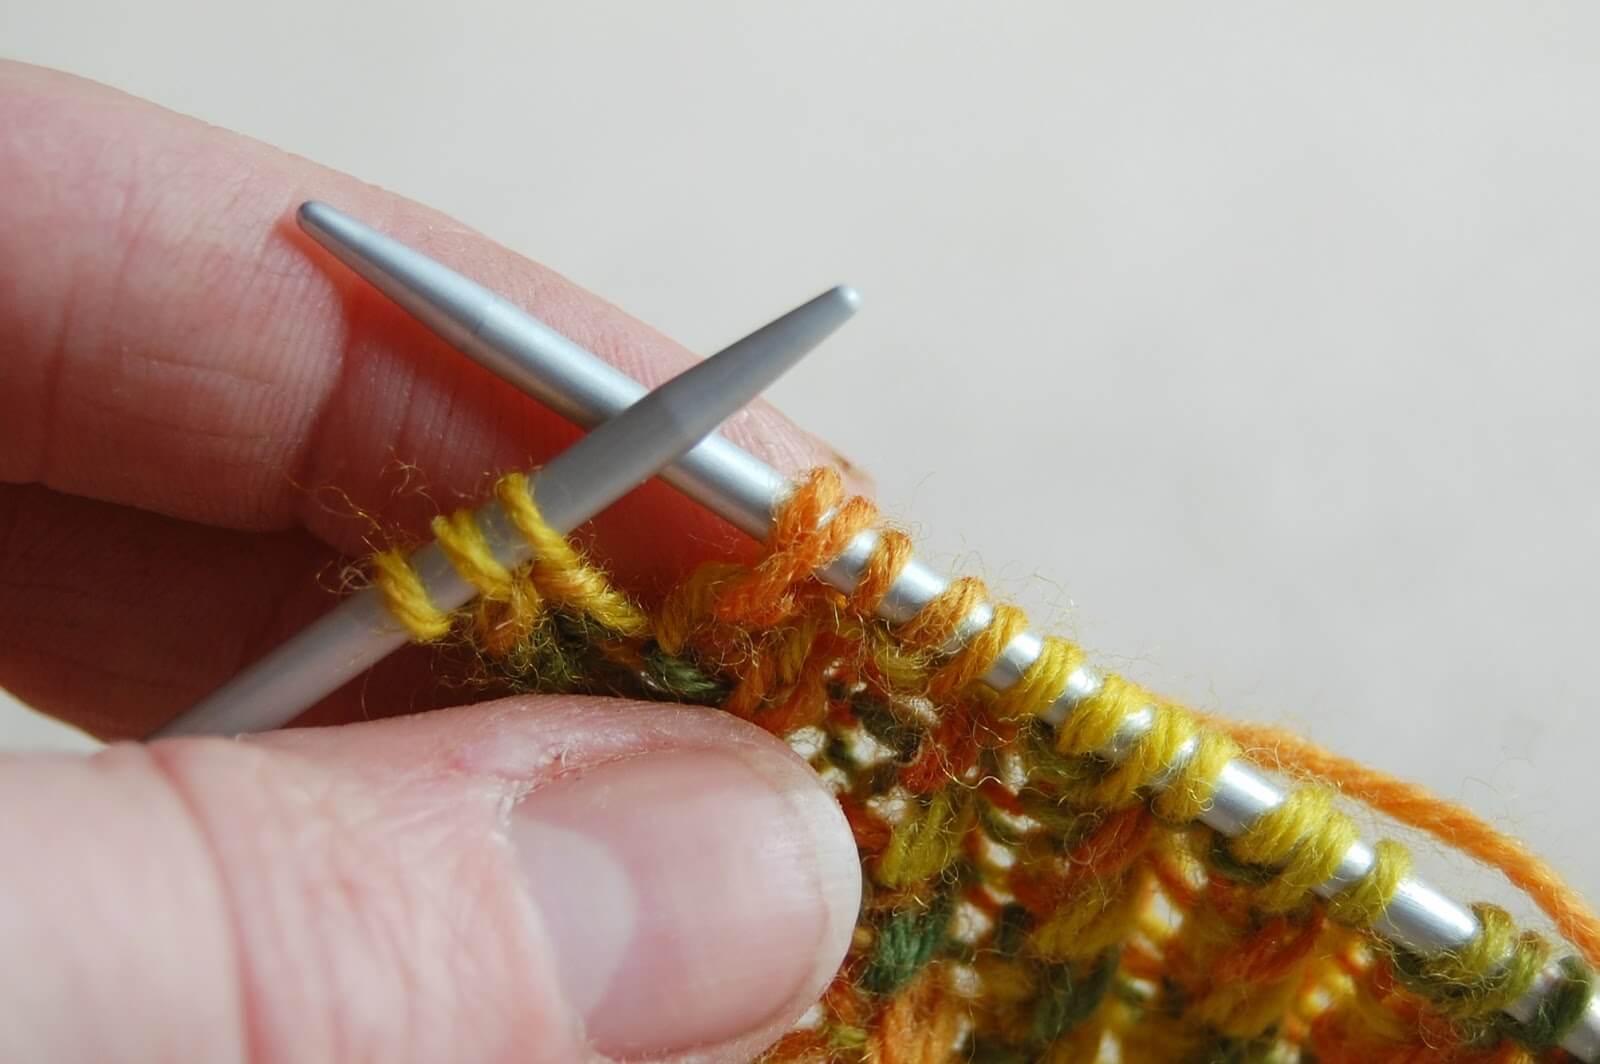
And that’s it! You’re all set!
Pattern
Cast on 64 stitches using 3.0mm needle.
1st row: *K2, P2*, repeat to end
2nd row: *P2, K2*, repeat to end
Change to 2.5mm needles. At this point, change to a short circular, magic loop or divide the stitches across DPNs and join into a circle, place marker.
Continue in K2, P2 rib for 14 more rows or until desired length of rib.
Knit one round.
Next round: ignoring the orange-coloured boxes marked on the pattern, work 16 stitches of pattern four times. Continue working as pattern is set, remembering to knit every even round as you are working in the round, not back and forth as you would do for a stole. Work in pattern until desired length is reached (for me, it was five blocks of pattern).
Heel
Change to 2.5mm DPNs.
1st row: K1, *cross2RK, P1* (31 sts)
2nd row: Sl1, *P2, K1* to end.
Repeat these two rows until heel measures 2½ inches. (If you want to make the heel longer, then you just need to remember that you will need to pick up more stitches for your gusset and decrease back down to 64 sts.)
Turn heel
Row 1: Sl1, P16, p2tog, P1, turn.
Row 2: Sl1, K5, SSK, K1, turn.
Row 3: Sl1, P6, P2tog, P1, turn.
Row 4: Sl1, K7, SSK, K1, turn.
Continue in this way, increasing one stitch between slip stitch and SSK or P2tog on each row until all of the heel stitches are used.
Knit across heel stitches if required to bring you to the left hand side of the heel ready to pick up 14 stitches. (I usually knit back onto my circular needle at this point.) Once you have picked up the stitches, place marker. Keeping pattern correct and starting at row 1, knit across top of foot, place marker, then pick up 14 stitches up the other side of the heel. Knit across top of heel and then shape gusset as below.
Shape gusset
Round 1: K to 3 sts before the marker, K2tog, K2, slip marker, knit across pattern stitches (row 2 of pattern) to next marker, slip marker, SSK, K to marker.
Round 2: Slip marker, work pattern stitches (row 3), slip marker, knit to marker.
Round 3: K to 3 sts before the marker, K2tog, K2, slip marker, knit across pattern stitches (row 4 of pattern) to next marker, slip marker, SSK, K to marker.
Continue in this way, decreasing by two stitches at the gusset on every other row until there are 64 stitches on the needle.
Once you have 64 stitches again, you can continue in pattern on the top of the foot only and knit across the bottom of the foot until you reach approximately 5cm before the desired length ready to start the toes. For my size 5 feet, this was about 3½ blocks of the pattern, ending with row 12.
Toes
Divide stitches up as follows:
Needle 1: 32 stitches of pattern plus 1 stitch so that you have a knit stitch on either side (33 sts)
Needles 2 and 3: Divide remaining 31 stitches between two needles.
Round 1: K1, SSK, K to last 3 sts, K2tog, knit to end of round.
Round 2: Knit
Round 3: K1, SSK, K to last 3 sts, K2tog, K2, SSK, K to last 3 sts, K2tog, K1
Round 4: Knit
Repeat rounds 3 and 4 until you have 30 stitches left and divide these between two needles so that front and back of socks match.
Graft toes using Kitchener stitch.
Do let me know how you get on if you make a pair of Watercress Leave Socks – I’d love to see them! You can find the Ravelry page here.
This sock pattern is free and will always remain so, but if you have enjoyed using it and would like to make a donation towards future projects, it will be gratefully received! You can find the donation button on the sidebar on the left hand side. Thank you! xx
This pattern copyright © 2014 Winwick Mum All rights reserved.
Not to be included in any collection or used for profit without written consent of Winwick Mum.








Once I have finished my other pair I'll give these a go they are GORGEOUS! Well done you, you are a constant source of inspiration.
Thank you! I'll look forward to seeing your socks too! xx
oh you are so clever they look lovely are they very soft and snuggle or more normal everyday type of socks i love the colours would love a pair like that, i can not knit at all
Thanks, Helen! They are soft and snuggly but I wear them as everyday socks. That's the lovely thing about superwash wool; it's much softer than cotton but is still hard-wearing and goes in the washing machine.
There are loads of good videos on YouTube to help you to get started with knitting if you haven't anyone to show you and you want to have a go xx
What wonderful colours and the pattern is super. I however, won't be trying it as I find it difficult enough to do a plain sock, never mind the pattern as well. Still, it is lovely to look at yours. I'm thinking of taking a sock course, hopefully if I am able, I might be a bit more confident. I'm wearing a pair of my own socks but as they were the first ones I did, they are rather baggy.
At least you're wearing your socks, that's a great achievement! Are they the ones you hadn't quite finished that you mentioned in a previous comment? A sock course is a great idea, and don't forget there are loads of tutorials for basic socks on the internet too. Thanks for your lovely comments xx
Oooh, love that heel! Thanks for sharing the pattern.
Glad you like it! xx
Just found you through Jenerally speaking blog. These are great socks! I've filed them on my pinterest board so I can have a go at making these in the future (I'm fine at crochet, but not so with knitting). Thanks for sharing the pattern and tutorial. Amanda x
p.s. Good luck with your blog award entry
Hi Amanda, thanks for visiting and for your kind words! I hope you do get chance to have a go at the socks some time, I'd love to see them! xx
Hi Christine, apologies if I've already posted this but cannot see it… Love this pattern for some special yarn that was bought for me… I have never followed or know how to follow a chart, just wondering if the pattern is written anywhere?? Will take me forever to work it out & write it 😩
Thank you 😊
Hi Francesca, this pattern was originally written for a shawl by Gladys We and she only ever produced a chart, not any written instructions. Following a chart is actually quite easy, as long as you take your time. Start by making yourself a copy that you can draw on and then you won't get mixed up with the rows – I cross out each row as I do it, or you can use a piece of paper or a ruler to mark the rows as you do them. You start knitting from the bottom right hand side and work your way across to the left. Each stitch is represented by a box and the symbols tell you what to do for each stitch. There's nothing in there that you can't do as you can already knit a sock, it's just a new way of doing it. Why not try out the pattern on a test square and see how you get on? You can knit is as if you were doing a tension square in the round by bringing the yarn back round so that you're always knitting (have another look at the Sockalong tension tutorial if you need to) and every even row will be a knit row so your block of pattern will be a total of 12 rows. You can do this! 🙂 xx
Thank you for your confidence in me Christine �� I think I panic every time I look at it �� What confuses me also is the rows numbered along the bottom and numbers going upwards on the side of the chart…I don't understand it, what do the numbers going upwards mean?? ����
The numbers going upwards are the number of rounds in the block, so this pattern is a block of 12 rounds (it is only numbered to 11 but you will do an extra knit round making it 12). The numbers along the bottom are the number of stitches in the block so that you can see where you're up to. At some point, I am planning to do an easy charted sock pattern to help people who've never knitted a sock like this get going, but I don't have a date for that just yet unfortunately. What about if you were to start off with a dishcloth pattern – this one is written and charted – so that you can see how it works? If you can knit that, you'll be able to do the socks as the process will be the same: kansascubsfan.files.wordpress.com/2013/05/lacy-diamonds-dishcloth1.pdf
Thank you Christine, I will definitely take a look at the dish cloth…that will really help having a written instruction along side to refer to, I am one of those people who learn best by being shown, so, when you are able to do one of your tutorials that will be brilliant 😊 Thank you Christine for taking the time here with me, really appreciate how busy you must be 😊💐💐💐
I think you'll find that if you can knit a dishcloth with a pattern, you'll be fine to tackle another project. The tutorial is definitely on the list – could do with a few more hours in the day, though! xx
So lucky to have had a day when I could spend so much time reading your blog from the beginning. Now I've found the first tutorial I think I'd better stop for today. Christine, you are a delight!
I'm glad you've been enjoying it, Ruth, thank you! xx
Hi Christine, how are you? I have a question. In the pattern I can see this symbol / and I don´t know what does it mean, this is SSK, but /???
Thank you very much, I am now studying the pattern to see if I am able to knit it.
Hi Eva, thanks for your message – I'm great, thanks, and hope you are too! That symbol represents K2tog, it looks like the designer has missed it out of her key chart. It's still a decrease but leans in the opposite direction to the SSK xx
Ok thank you very much, so like I can do it this is going to be my next project. I'm great too, missing my days Skipton…thank you.
That's great! I don't think these will be any bother to you, just remember to put lifelines in and mark off the pattern when you finish each round so that you know where you're up to 🙂 xx
Christine just had to say a huge Thank you to you for your kindness and generosity. It is so lovely to find a craftswoman so willing to share her beautiful work, for no other reward than a Thank You. Your work is inspiring and your tutorials are great. Michelle
Hi Michelle, that's really kind of you to say so, thank you! xx
Hi Christine, can't wait to try these out (i have blue and purple wool just waiting). My one issue is that I usually work a 56 stitch round – 64 would fall off me! I was thinking of doing a 3 pattern round with a band of plain up the back… unless you have a better suggestion?
Hi Adrienne, the alternative to having a plain band up the back would be to use the pattern section as it was originally written for the stole which means 19 stitches to each pattern block. That would give you 57 stitches worked over 3 blocks so you'd need to lose 1 somewhere in one of the pattern blocks but you'd be able to work out which one was best for that as you set your pattern up. Hope that helps! xx
Oh, you mean use the orange blocks as well? That's brilliant! I didn't even think of that! That will look much better than my idea!
Hi Christine,
I've just tried downloading your watercress pattern socks – it tells me the file does not exist!
I don't think it's me – just wondered if you're able to help.
I just want to say thank you so much for being so generous with your patterns – I've got your second book, but fancied a go at this pattern.
Thanks
There was a problem with the link but I've fixed it now so you should be able to get the pattern. Thanks for letting me know! xx
I've got it now – thank you for getting back to me so quickly.
My yarn and needles are ready to go!