Reinforcing heels, soles and toes – free tutorial
If you’ve been following the blog for the last few months, you’ll know that big daughter went to Peru for four weeks in July this year, working on a social project and trekking high up in the Andes mountains. I knitted two pairs of socks for her to take with her which you can read about here, and they kept her feet very comfortable and blister-free.
I used my Basic 4ply Socks pattern with a few adjustments to accommodate the yarn that I chose, and I also reinforced the soles and toes with heel stitch so that they would have the same cushioned effect as the heel flap.
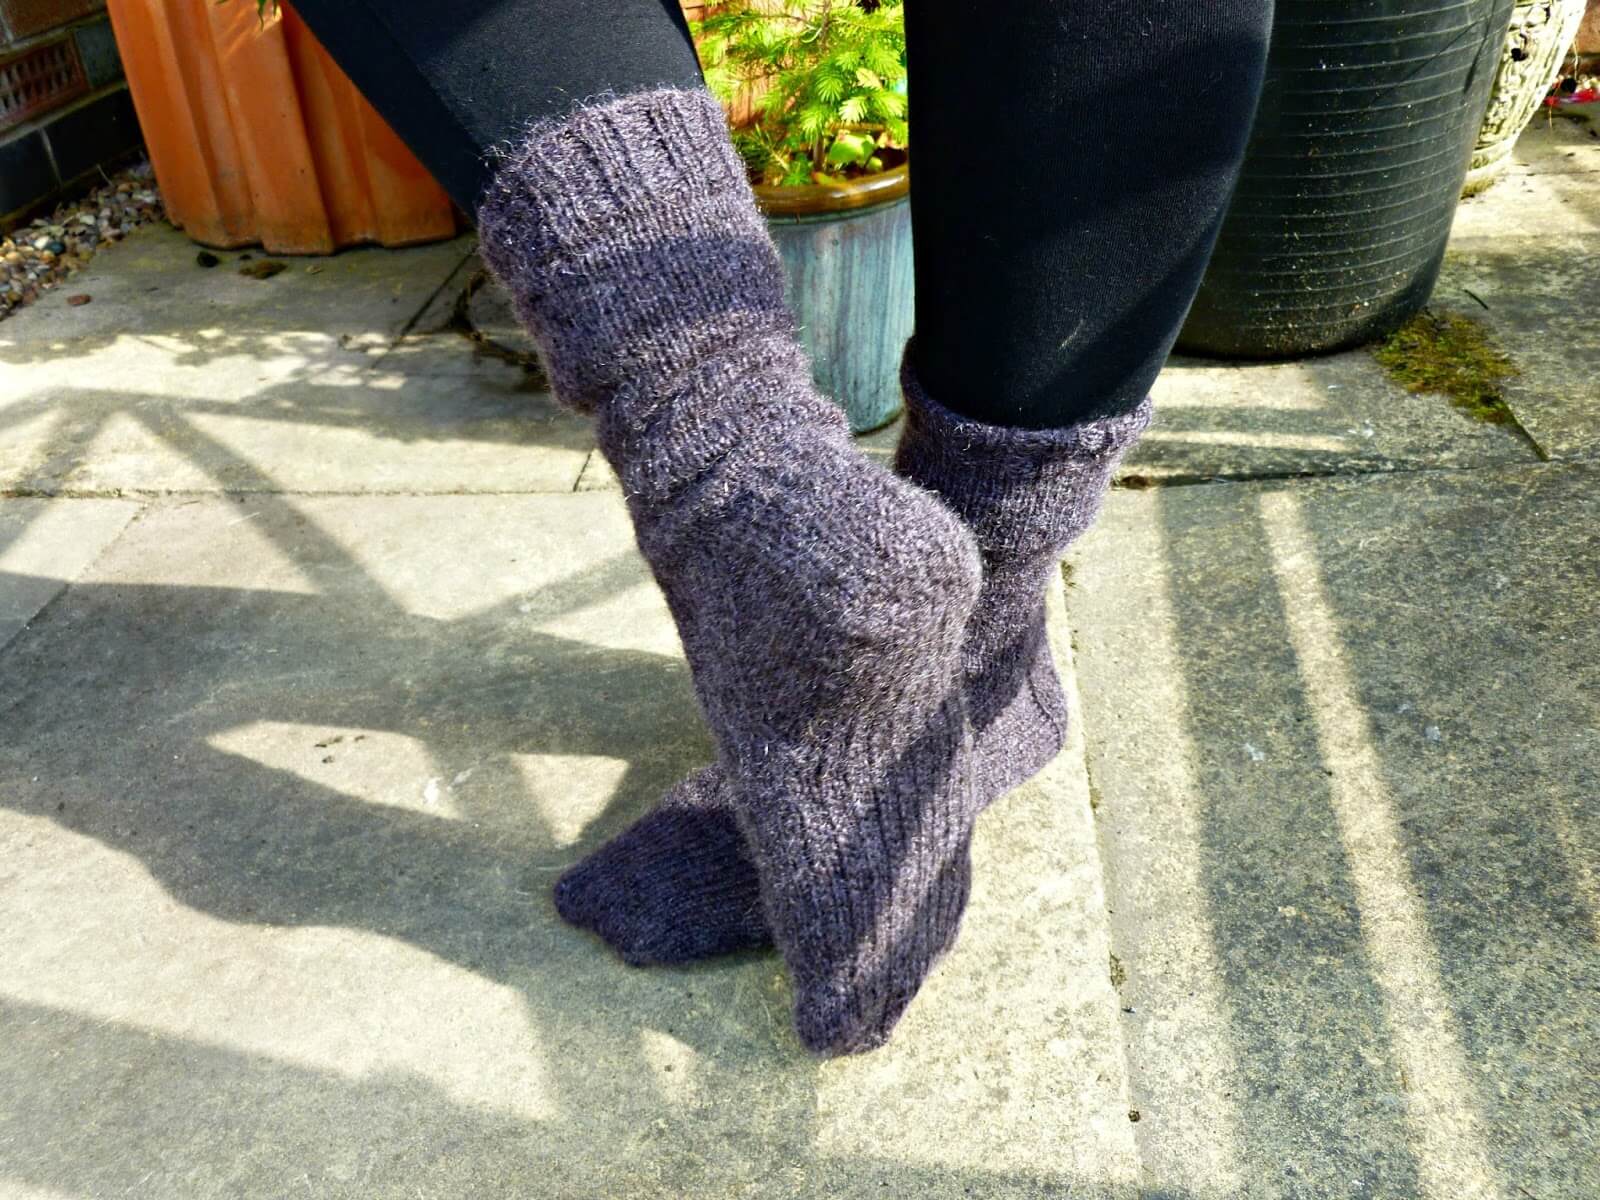
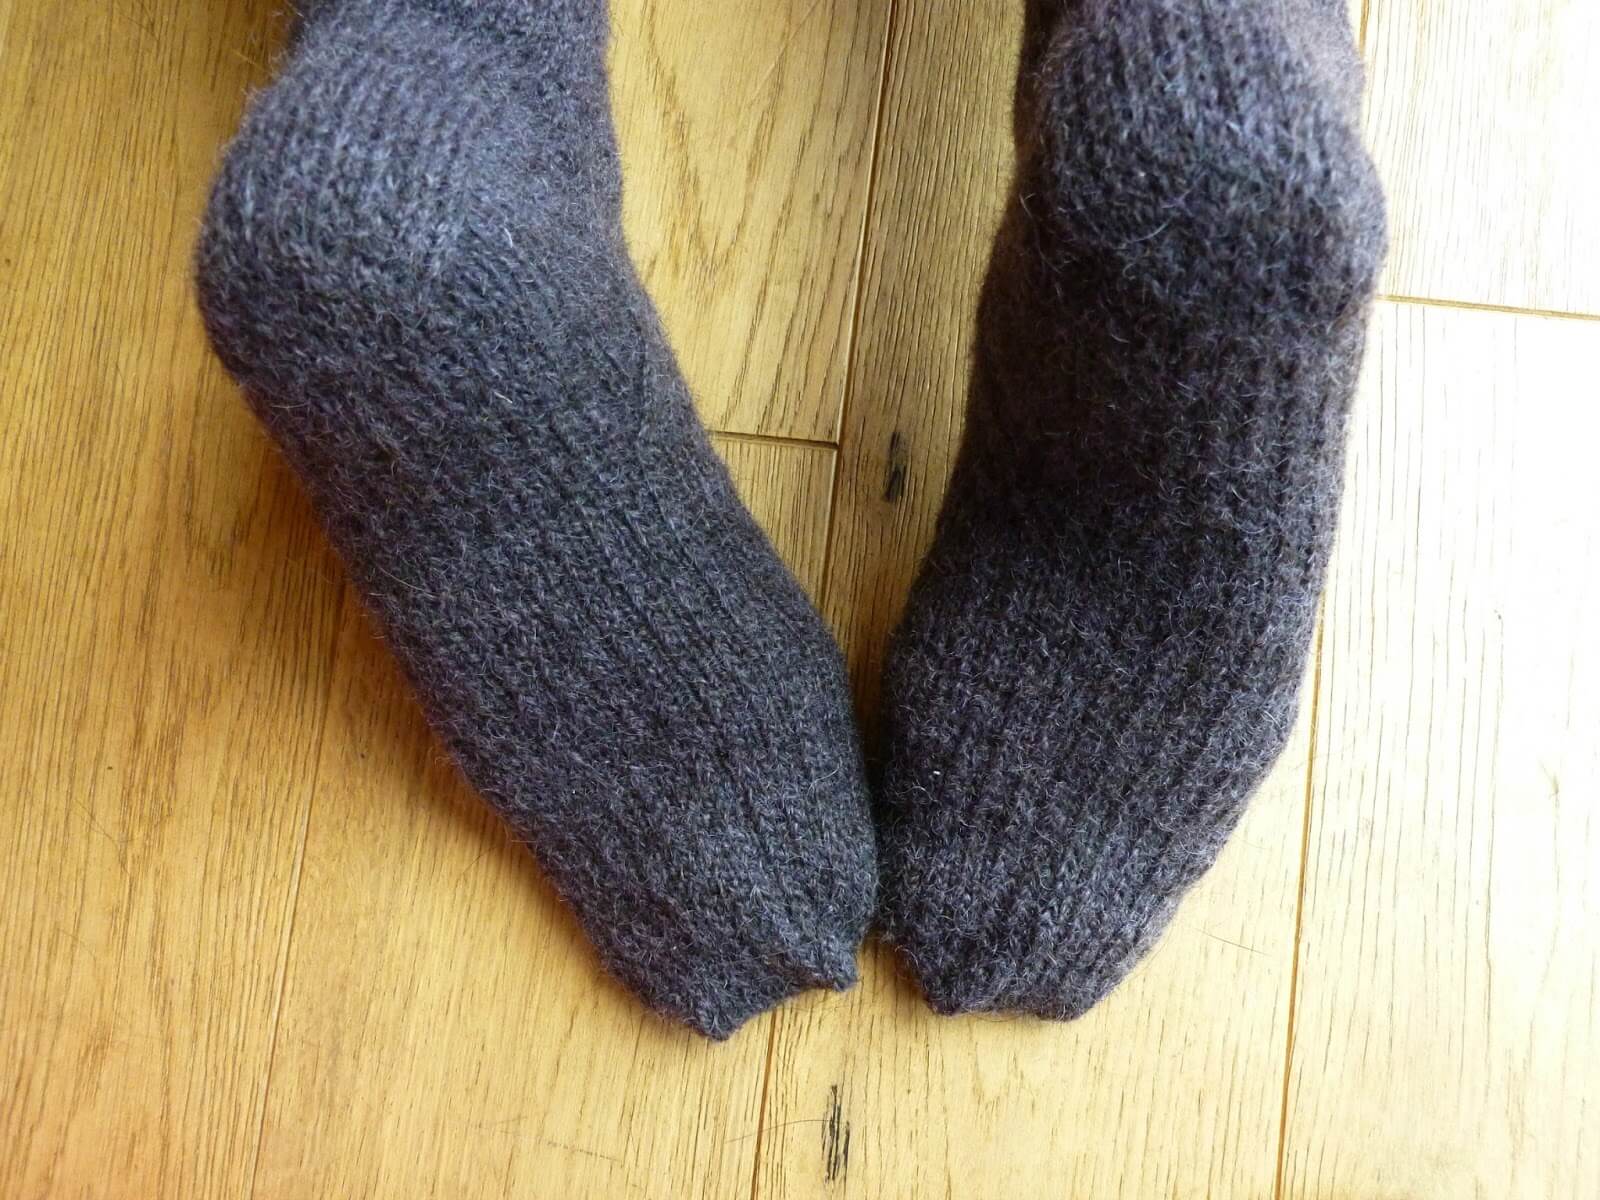
It’s quite easy to do this, although the first time you try it takes a bit of thought so that you get the lines running down from the heel flap and along the sole, so I’ve created a tutorial to show you how to do it in case you’d like to try it for yourself.
The sample sock that I’m using is knitted to my Basic 4ply Socks pattern but using DK (8ply) yarn and you can find the pattern for that here. The process for reinforcing the soles is the same for any yarn and any sock size so you should easily be able to adapt what I’m showing you for any size of sock that you’re knitting. I chose to make the heel stitch section across the sole the size of half the sock, that is, half the number of stitches that I cast on, but you can make yours as wide as you like.
This tutorial focusses on the heel and the sole and not knitting the whole sock as I’ve made the assumption that you already know how to do that. If you’ve never knitted a sock before, or you’re not sure about creating heel flap and gusset heels, don’t worry as you can find step-by-step tutorials on how to knit a pair of socks here using the Sockalong tutorials, and don’t forget that you can always ask for help in our Facebook group too.
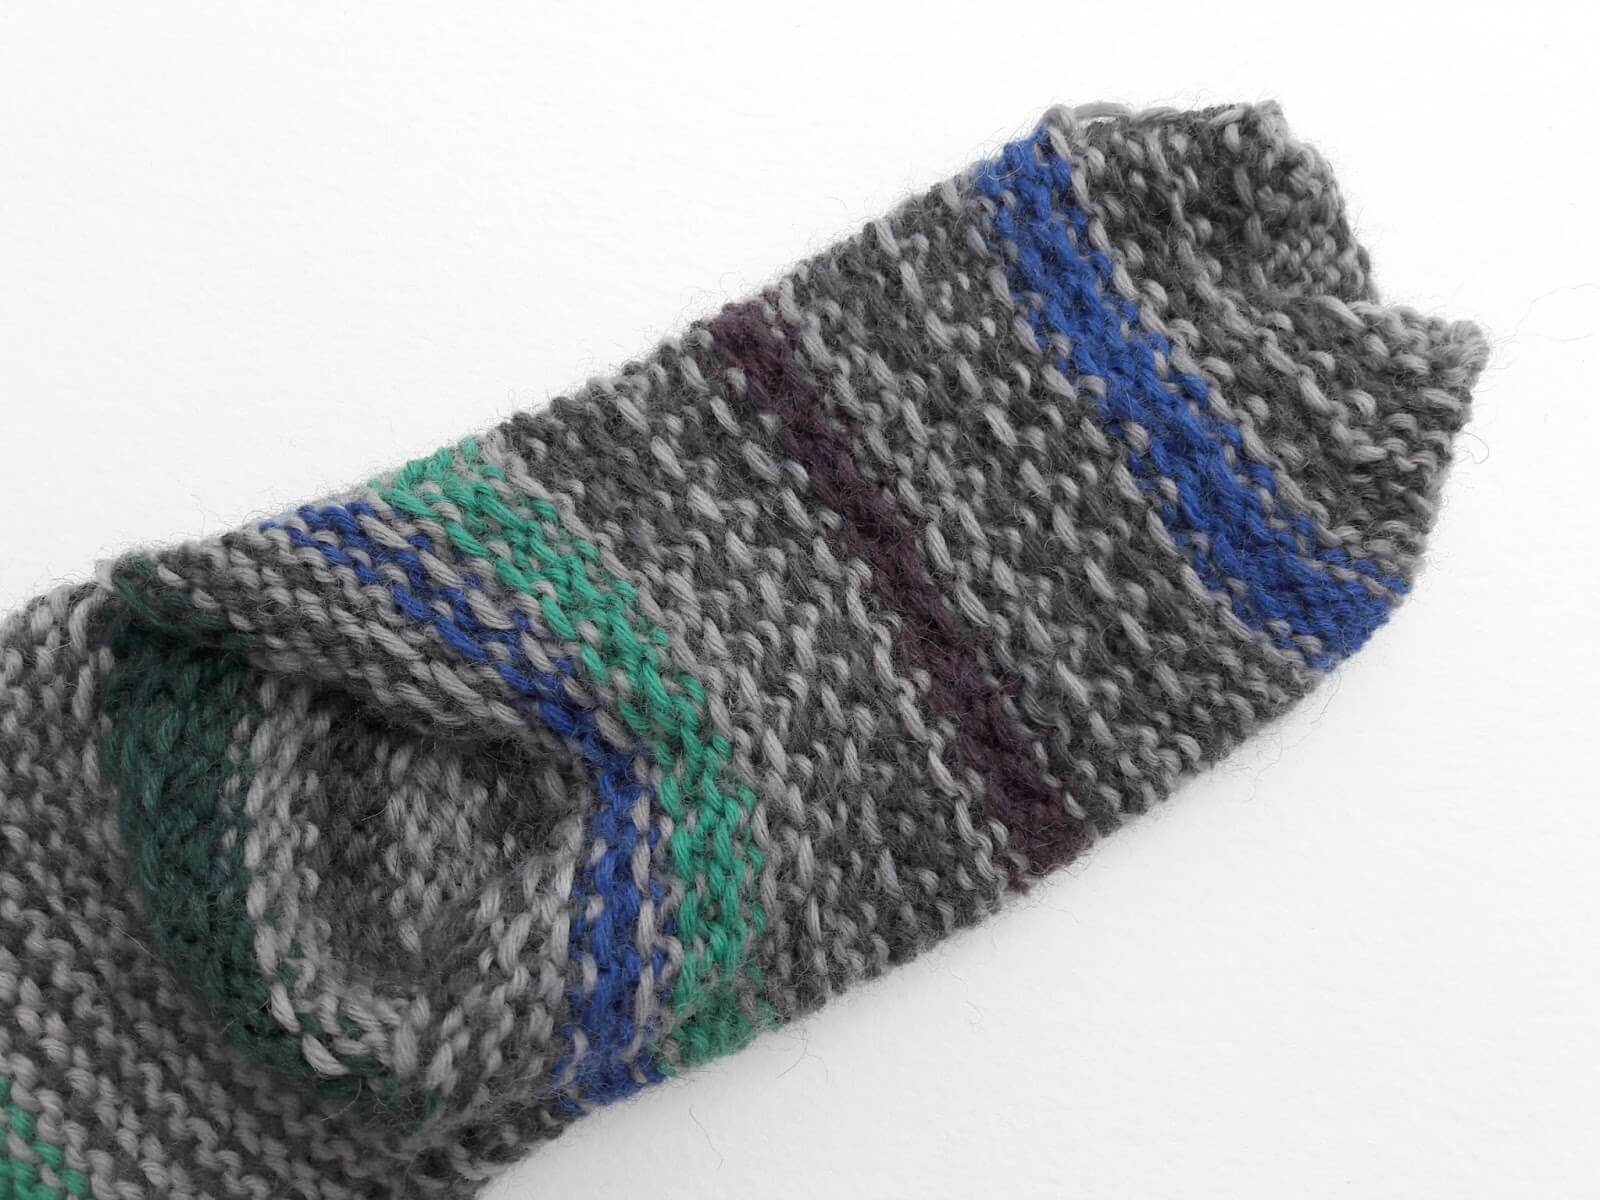
You can see here how the heel stitch continues under the foot – this is what we’re going to be creating in this tutorial.
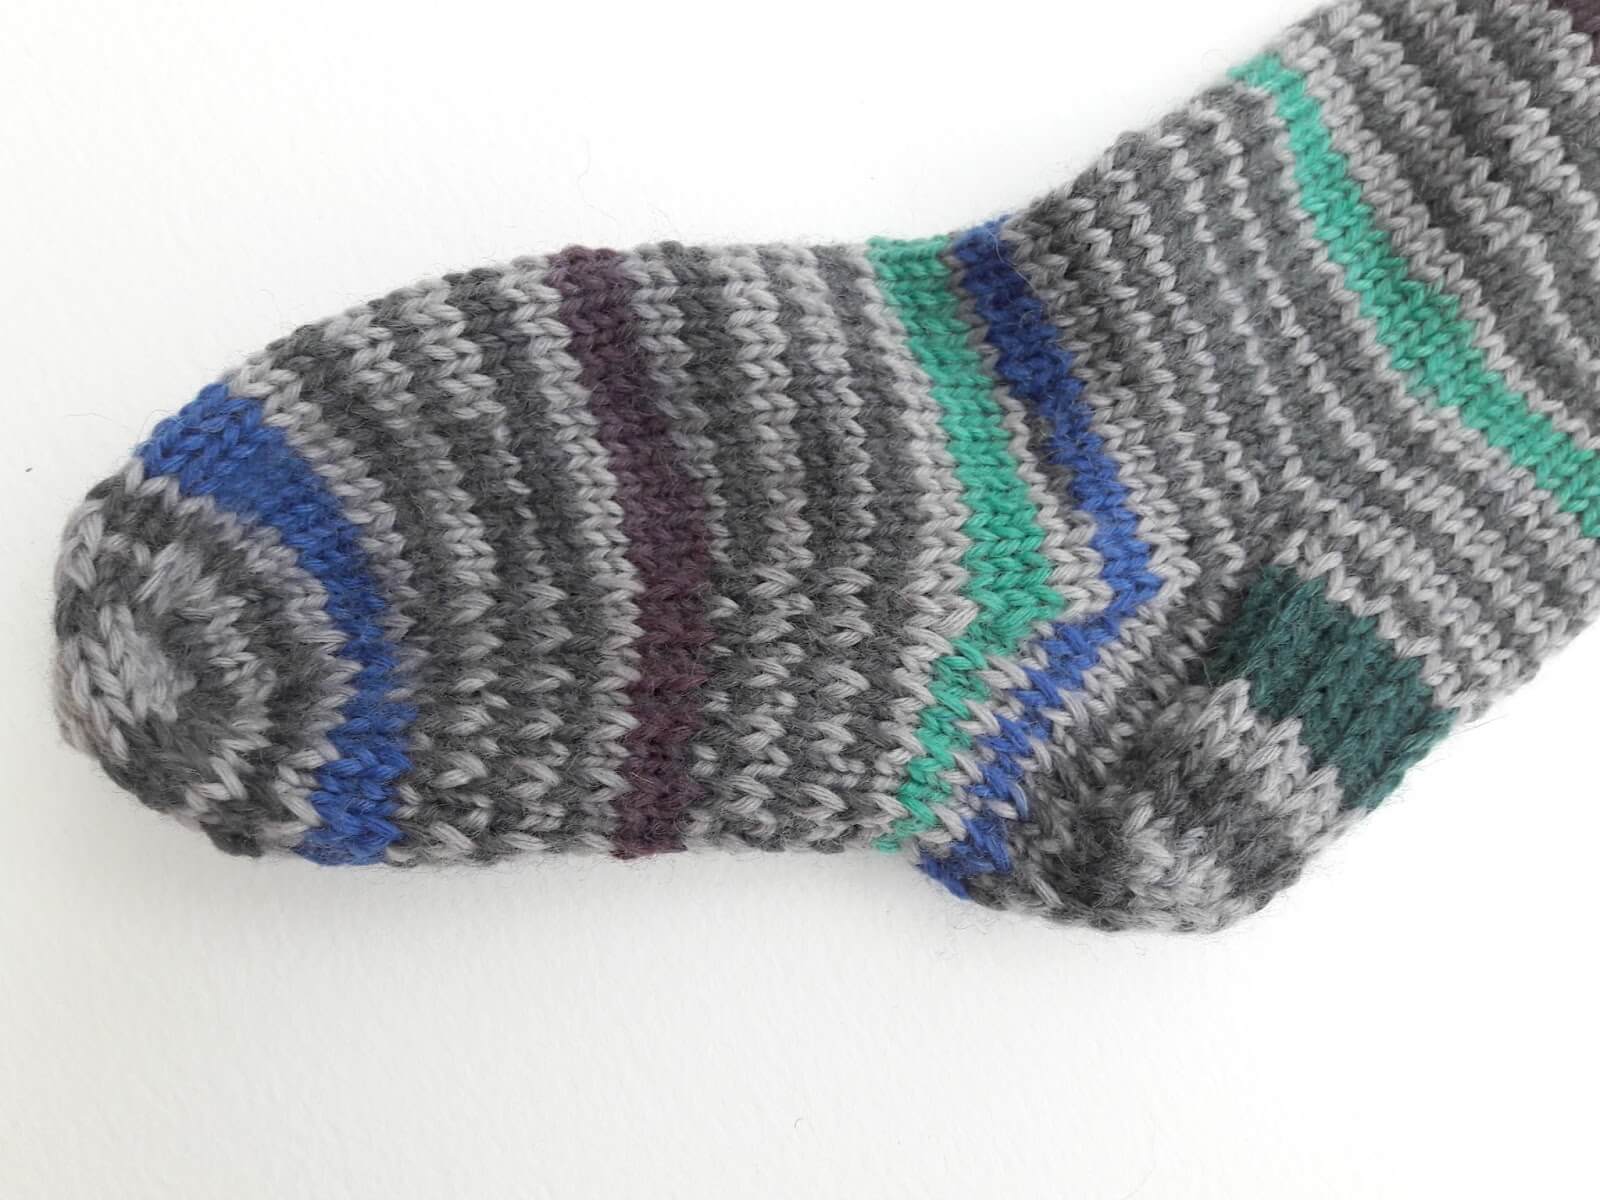
Are you ready? Here goes!
Start by knitting your sock to the end of the heel flap, just before you start the heel turn.
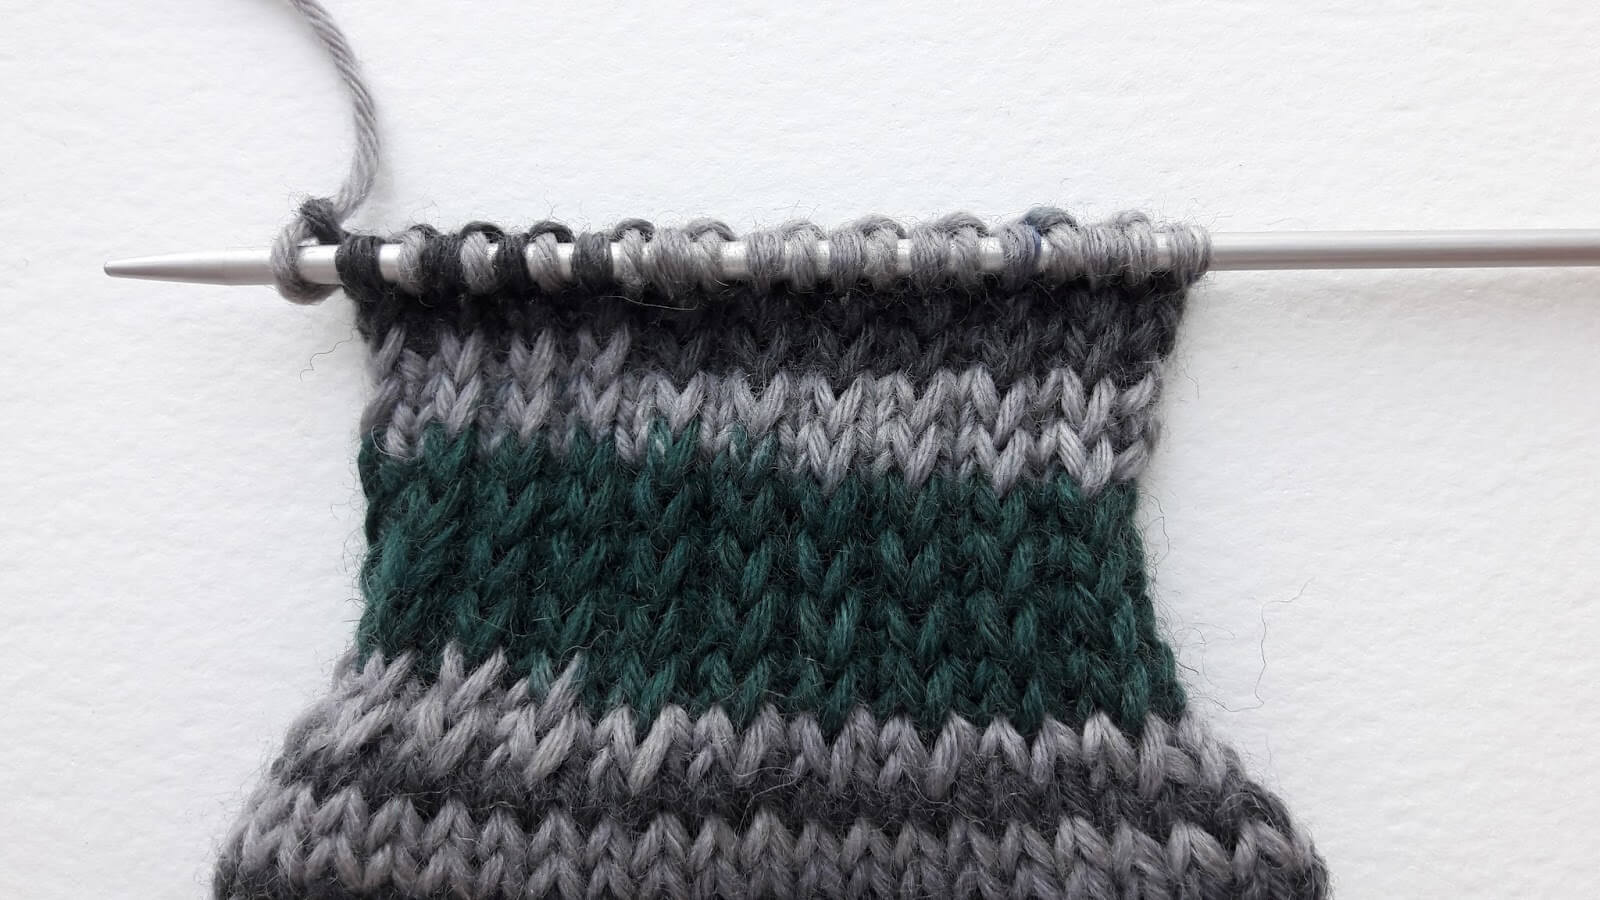
Next, turn your sock and work the set-up row to get yourself to the middle of your heel flap stitches, just as you would for any other sock. When you turn to work your first heel turn row, you need to continue in heel stitch instead of knitting plain as you would do normally, so you slip the first stitch and then either slip or knit the next stitch depending on which is next in your heel flap (the number of stitches in your heel flap will depend on whether your first worked stitch is slipped or knitted). You can see from the photo below that it’s easy to see which stitch comes next by looking at the stitches in the heel flap. Here’s the really important bit – don’t pull the yarn too tightly across the slip stitches or it will pull your sock sole in too tightly and it won’t feel comfortable to wear. It will also make the bottom of your sock shorter than the top and that’s not good either!
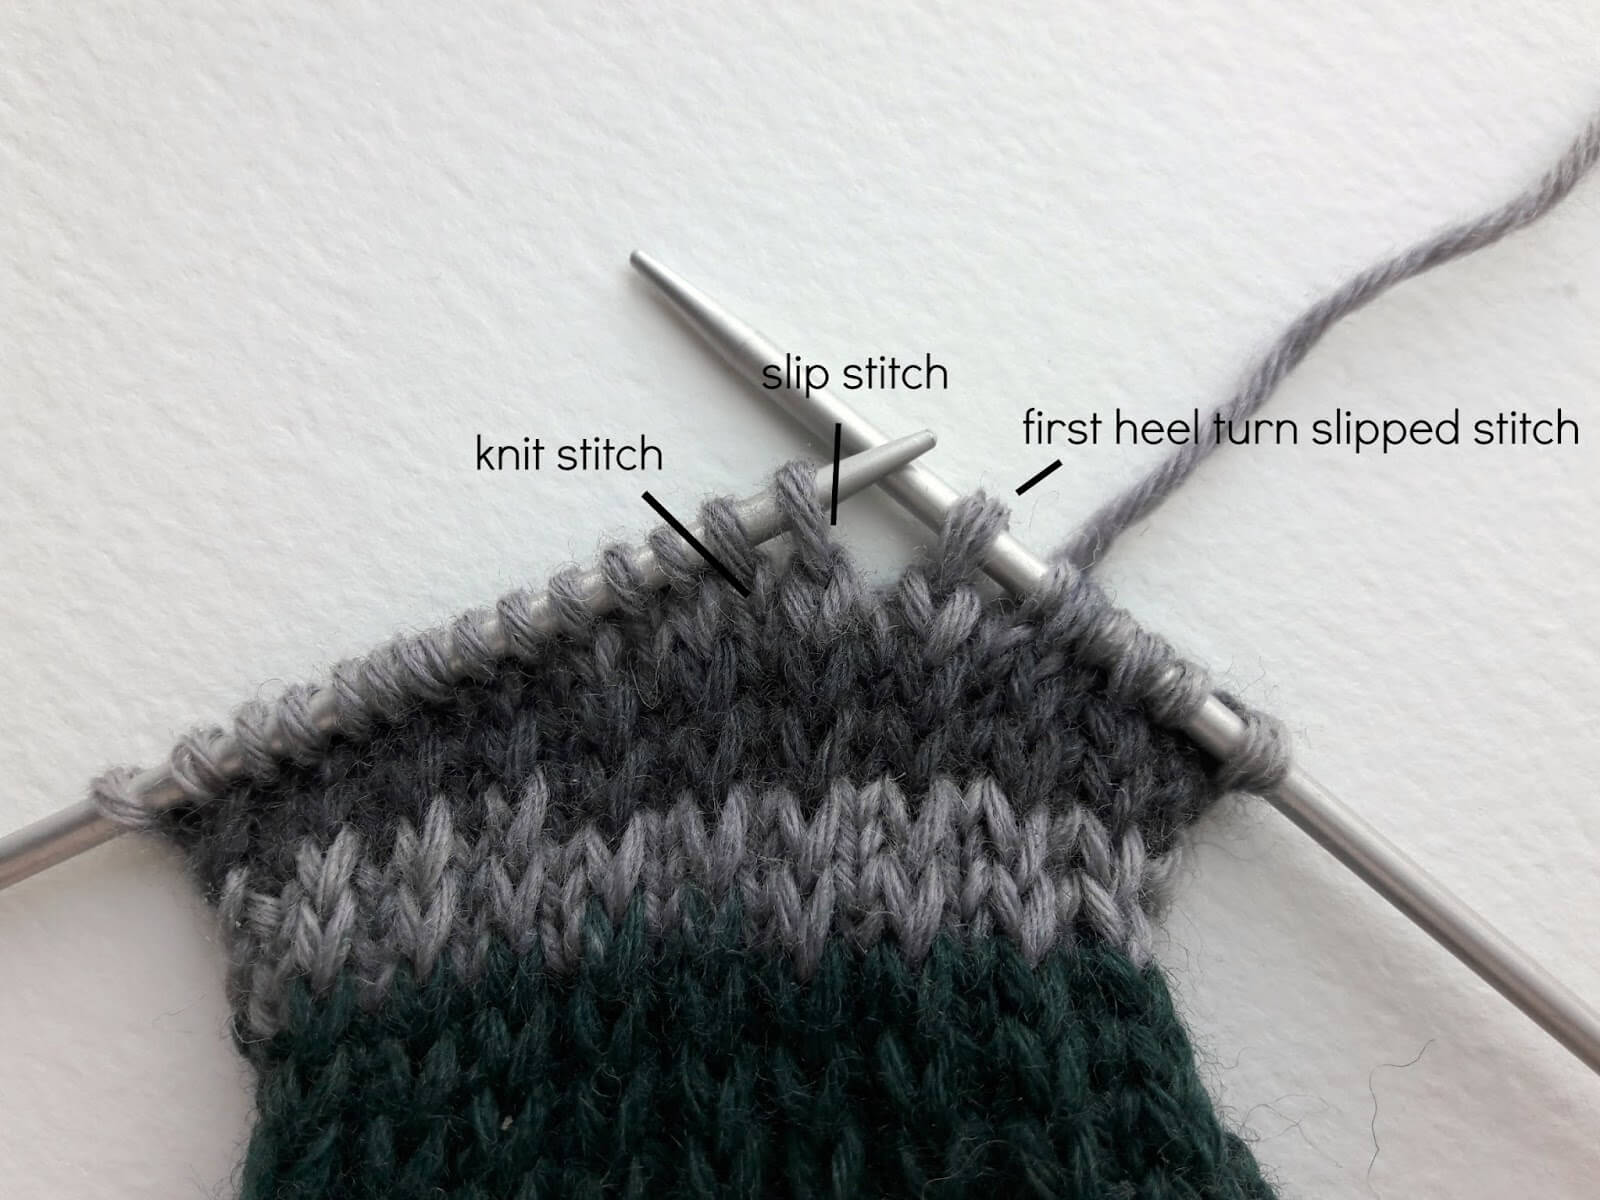
As you continue to work your heel turn – slip 1, purl across, P2tog, P1 on the wrong side and slip 1, then slip 1, knit 1 in whichever order matches your heel flap on the right side – then you can see how the lines continue as you turn the heel.
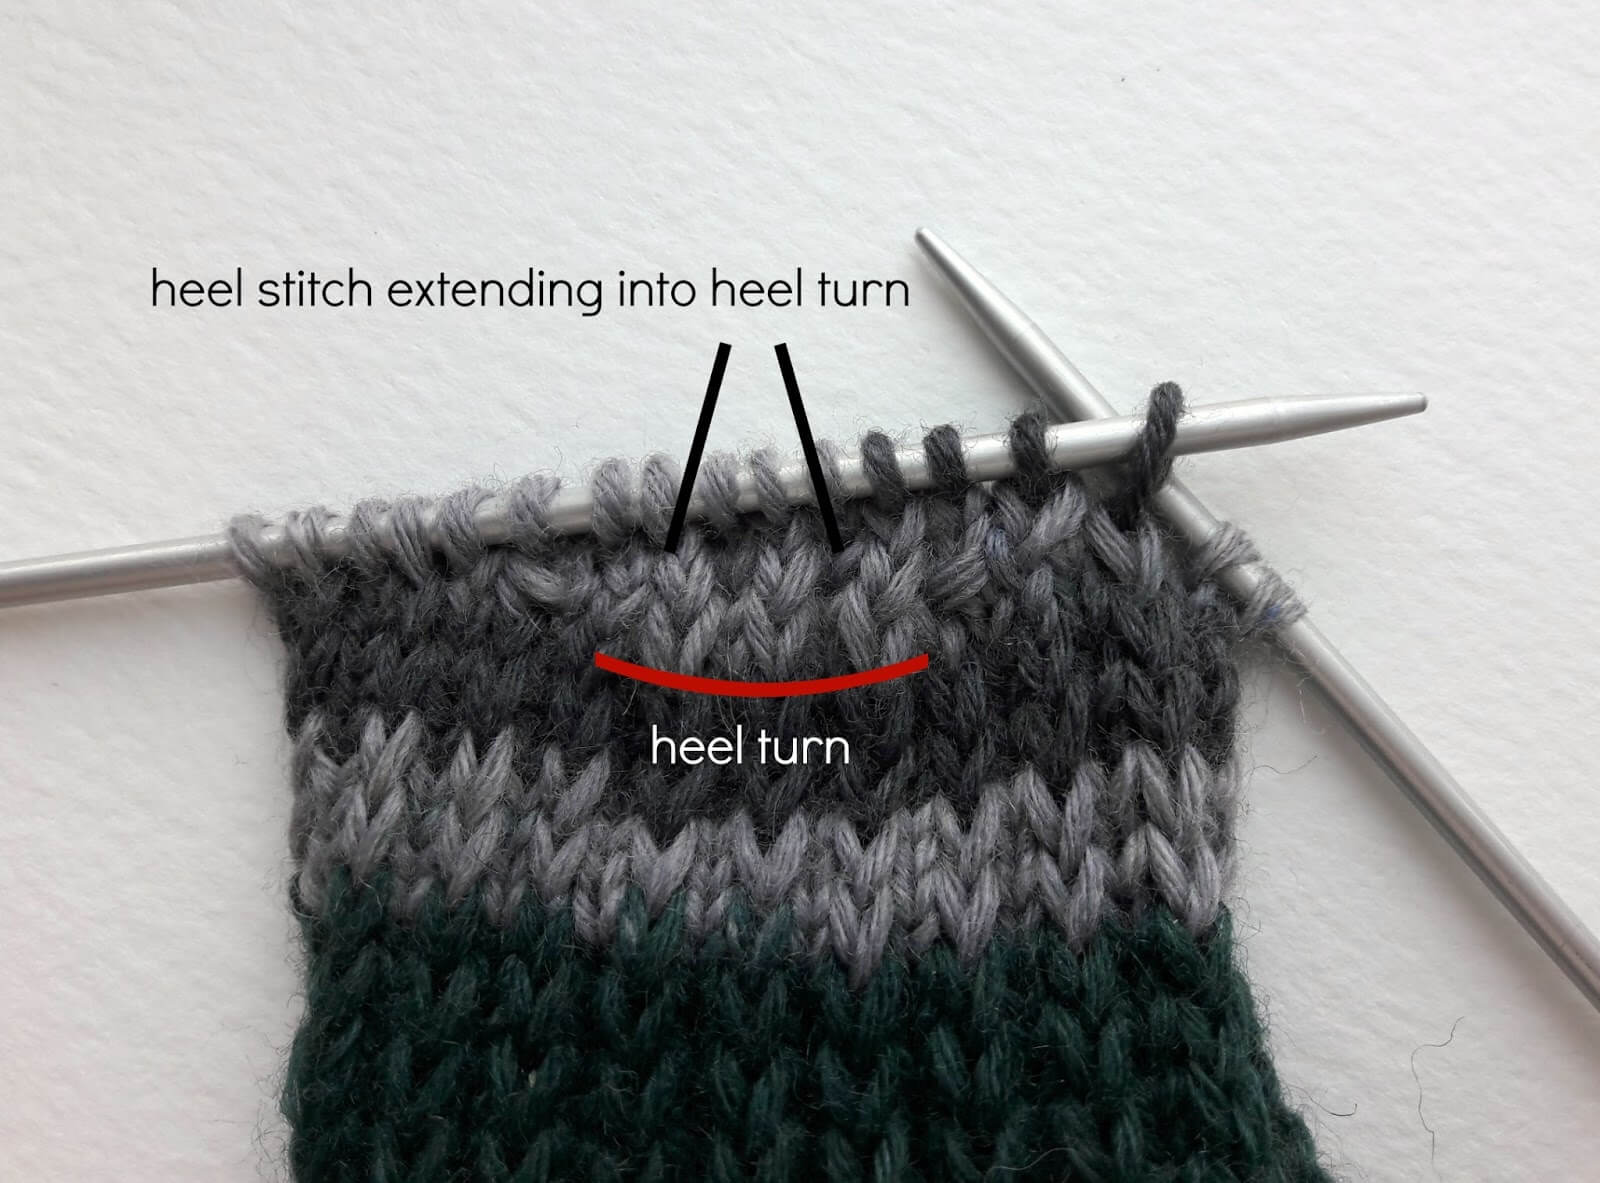
Continue to use up all of the stitches on each side as you would do for a plain knitted heel flap. In the picture below, you can see how the heel turn blends in perfectly with the heel flap and the yarn is on the left hand side ready to pick up the gusset stitches.
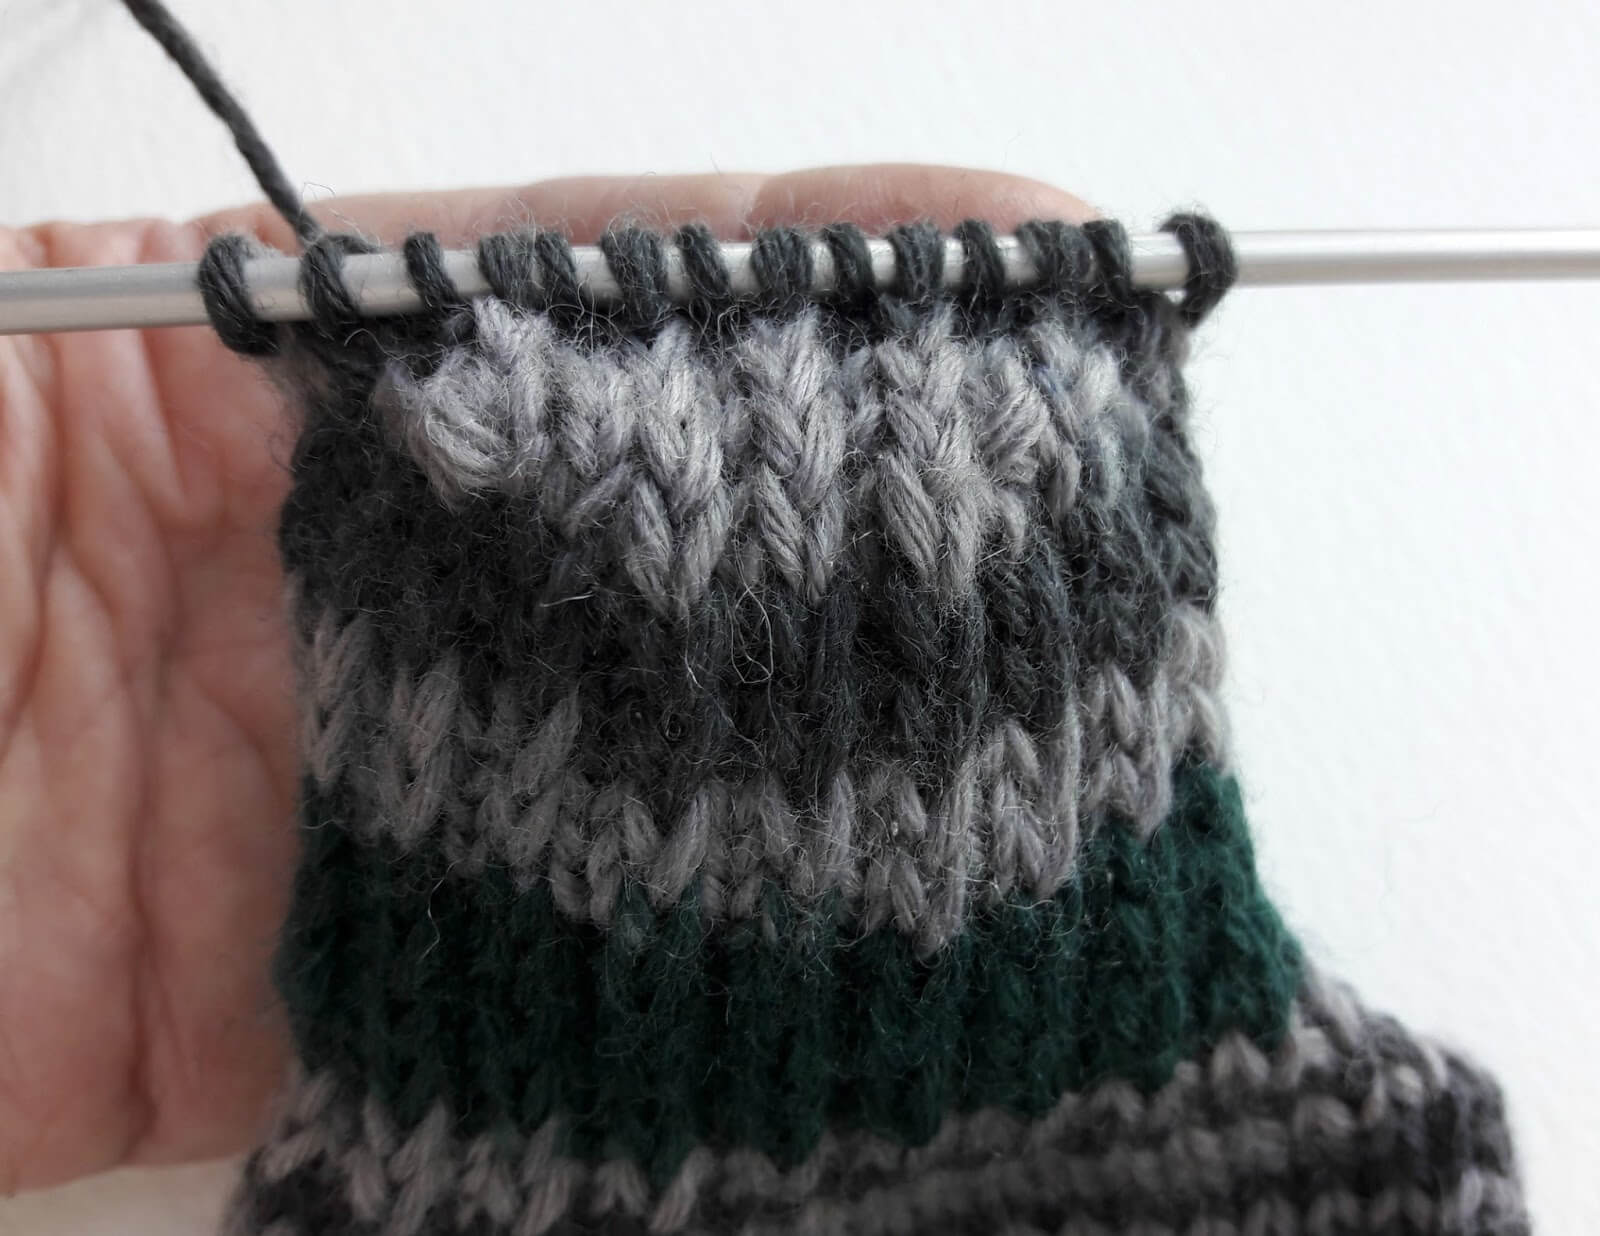
Next, pick up however many gusset stitches you require down the left hand side of your sock using a second DPN, knit across the top of the foot stitches, place a marker over your needle (if you’re using DPNs you don’t need to do this but it’s useful for circular needles – in the photo below it’s the marker on the left) and then pick up the stitches along the right side of your sock, just as you would for any other sock. I’m using a short circular needle and have chosen to pick up the stitches with my circular needle, but you can use another DPN if that’s too fiddly. If you’re using a long circular, you can keep all your stitches safely on the cable whilst you pick up along the heel flap. You can find more information on picking up stitches in this Sockalong tutorial.
Place another marker over your needle before you start knitting the heel turn stitches (in the photo below, this is the lime marker on the right and again, you don’t need to do this for DPNs). You are going to knit across the heel turn stitches for this round. Although you purled every other row on the heel flap, you can’t do that once you’re working in the round again, but knitting every other round produces the same effect.
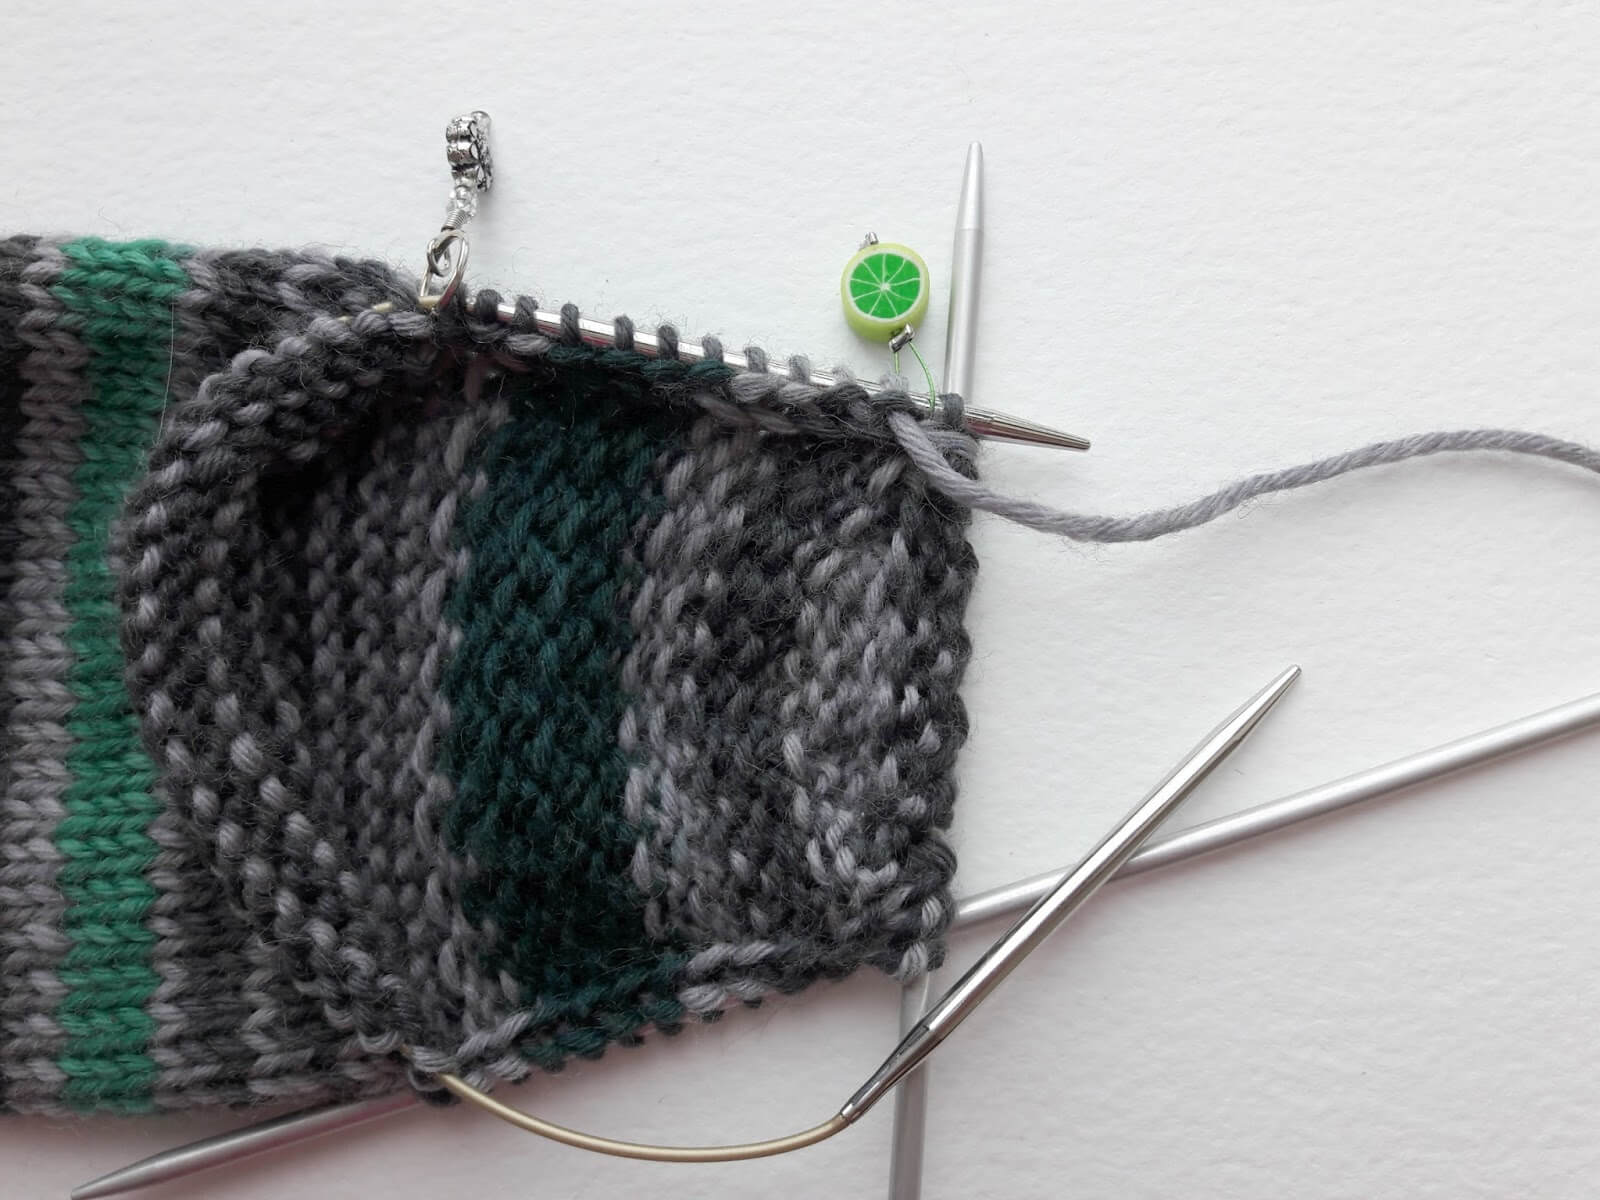
Once you have knitted across your heel turn stitches, place another marker over your needle (mine’s a strawberry this time!)
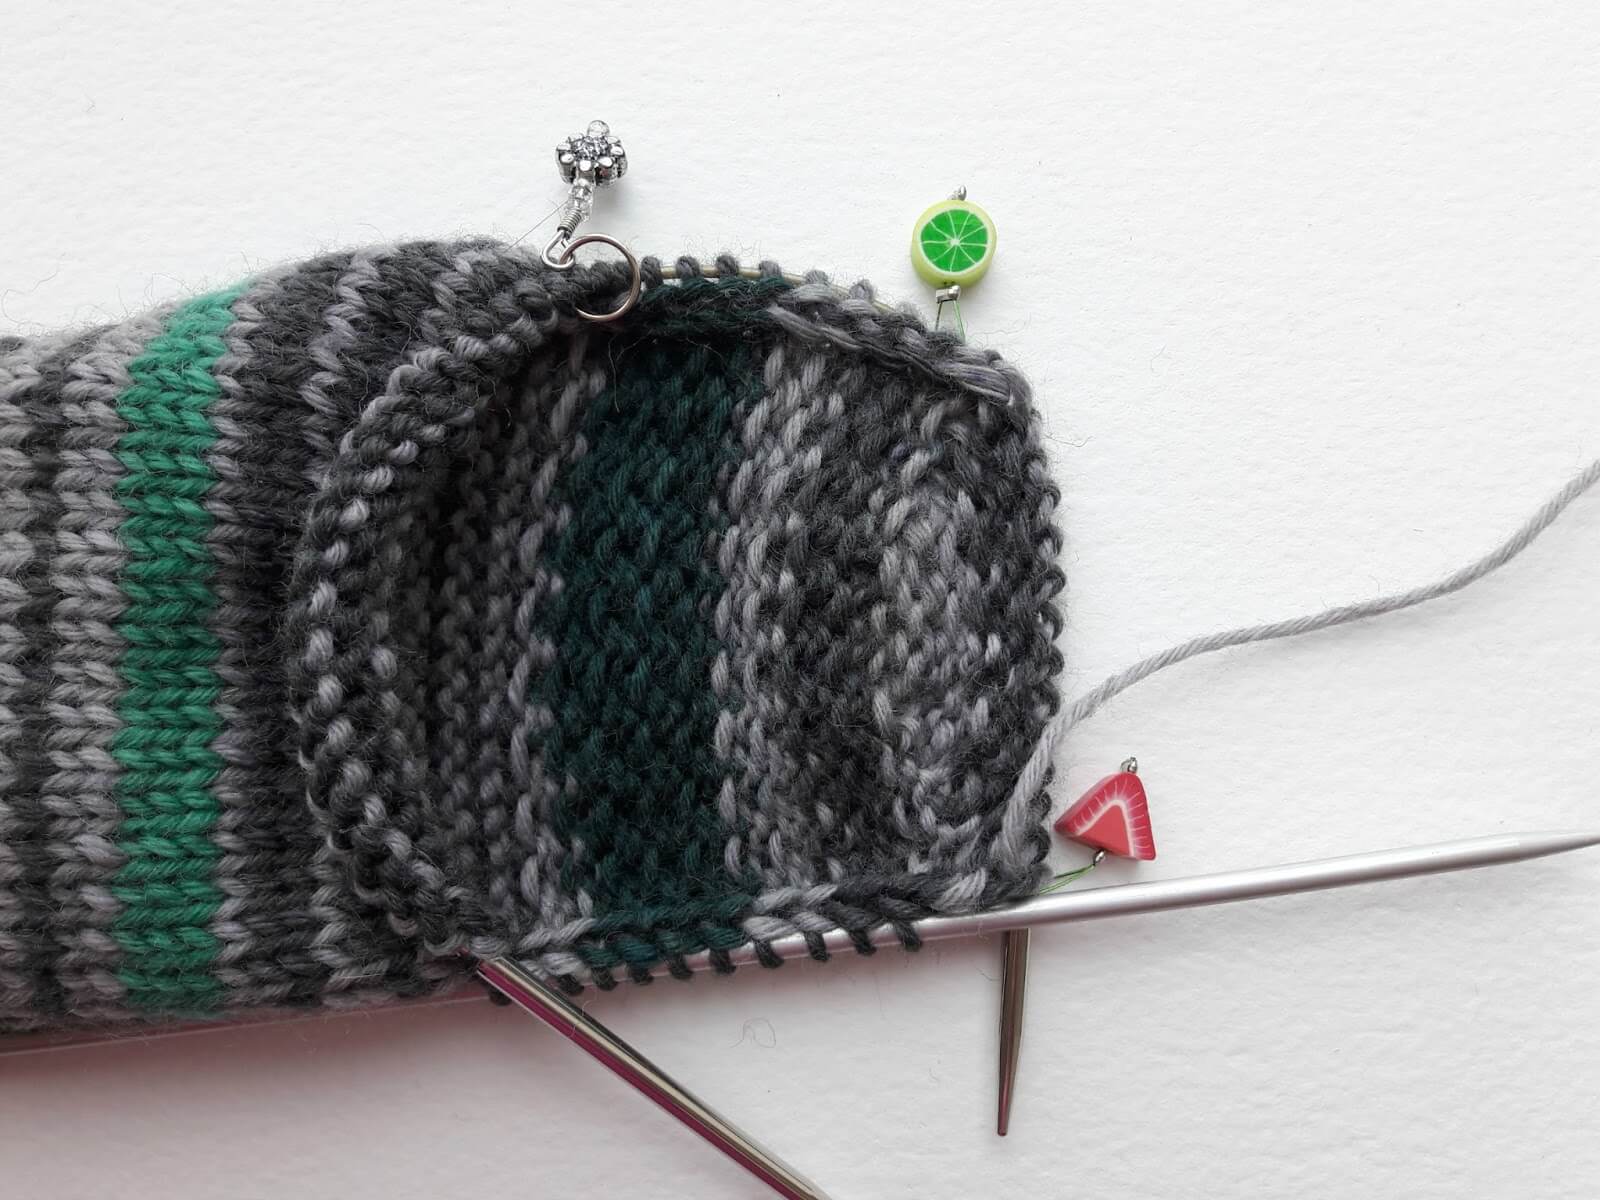
and then knit down the first set of picked up stitches until 3 stitches before the end of the needle, ready to do your first decrease. Once you have decreased, add another marker (the pink flower at the bottom in this photo).
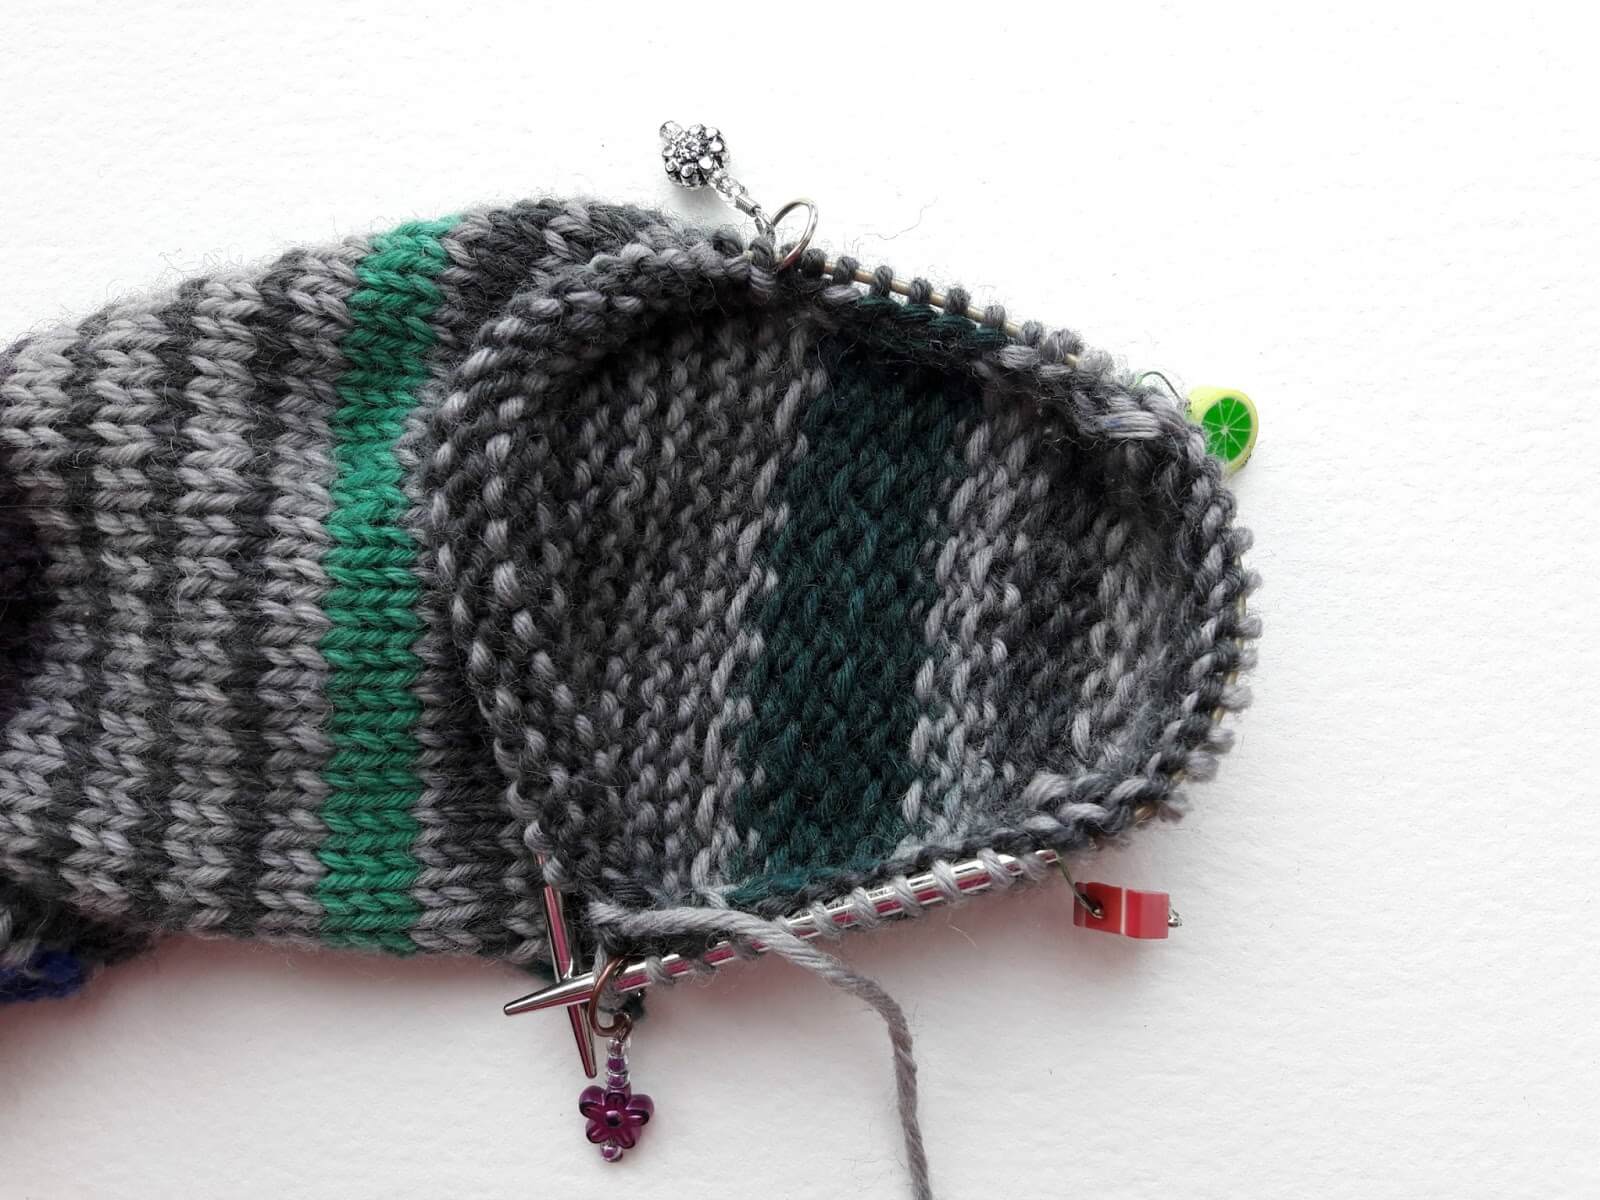
You should now have 4 stitch markers on your needle. I use 4 different markers so that I don’t get confused about where I am on the round, and I’m using 4 rather than the usual 2 because I want to know where my heel turn starts and ends. If you’re using DPNs, you can divide your stitches however you like, using markers if you need to or otherwise keeping the stitches separate on your needles.
Now, following the instructions for round 3 of the gusset of the sock pattern, after having knitted your first decrease stitch (K2tog), you are going to knit across the top of the foot stitches, then make your second SSK decrease and knit up to the heel stitches again, but stopping one stitch before the marker.
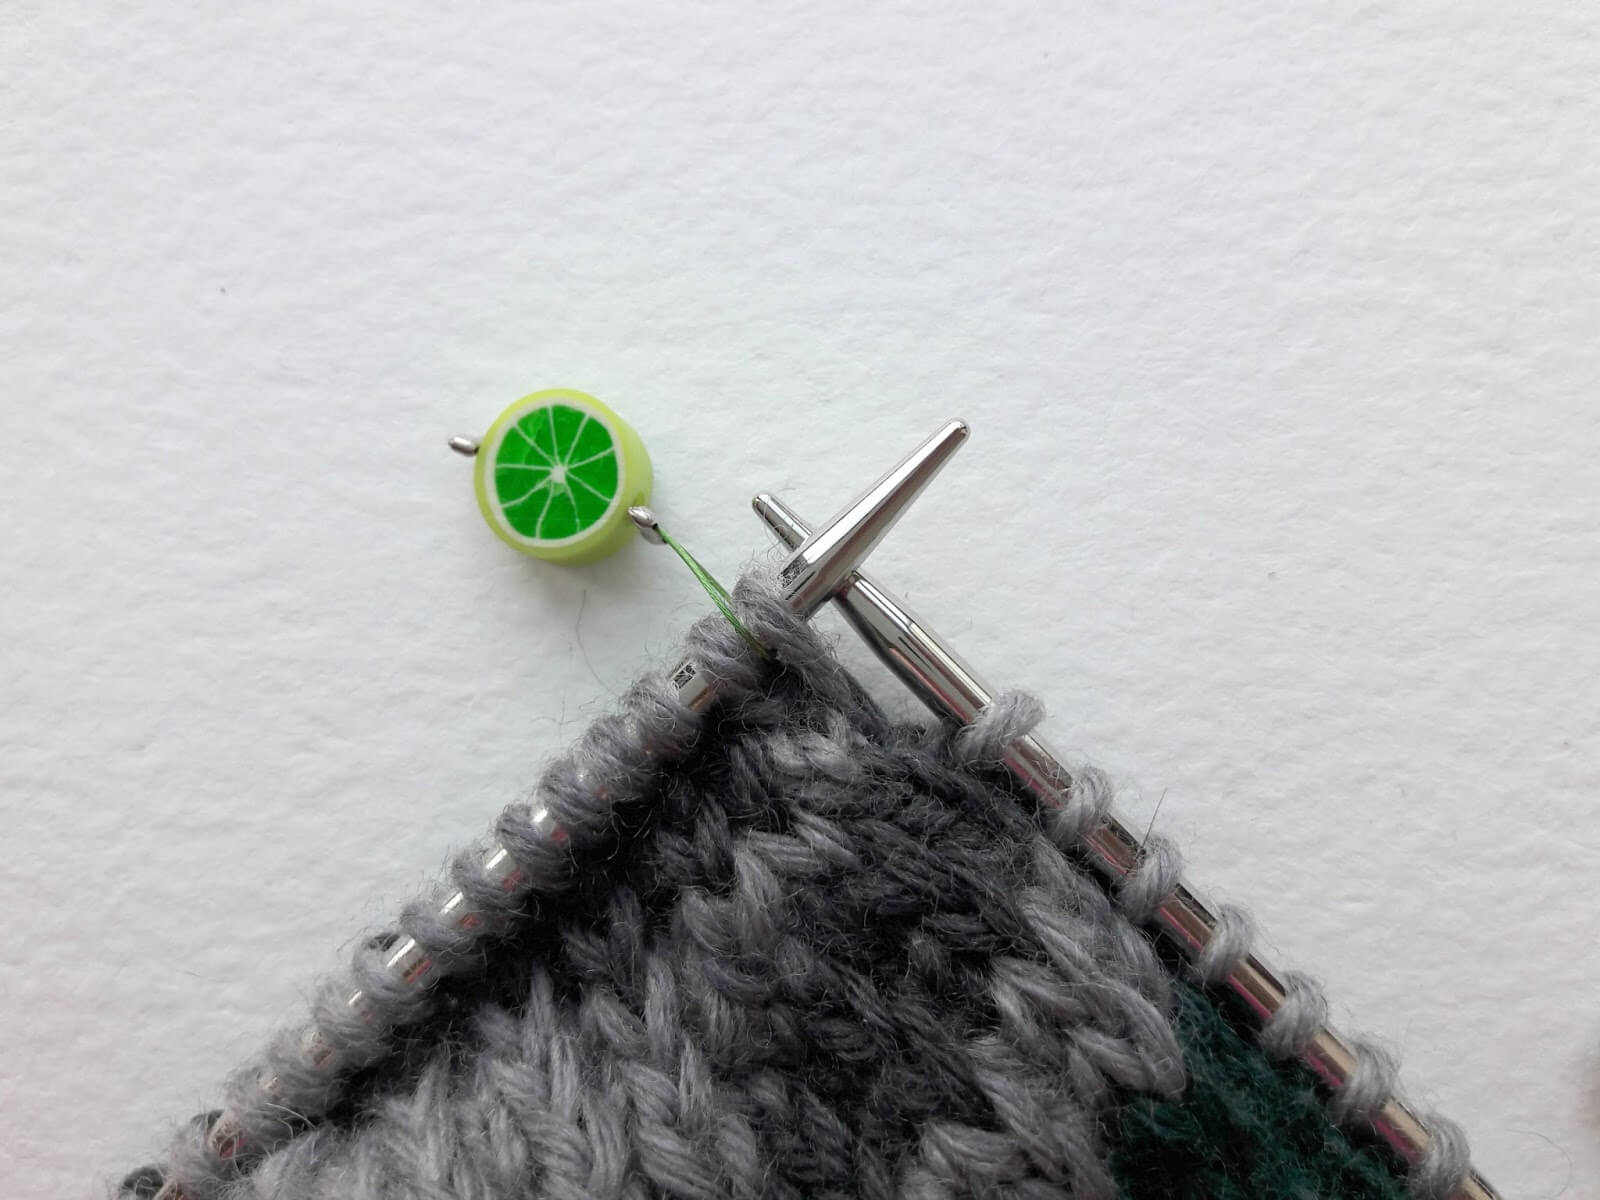
This is where we start to extend the heel stitch to cover the whole bottom of the foot. Slip the next stitch from the left hand needle to the right without knitting it, slip the stitch marker off, then slide the slipped stitch back onto the left hand needle and put the stitch marker on the right hand needle. This has increased the number of your heel turn stitches by one.
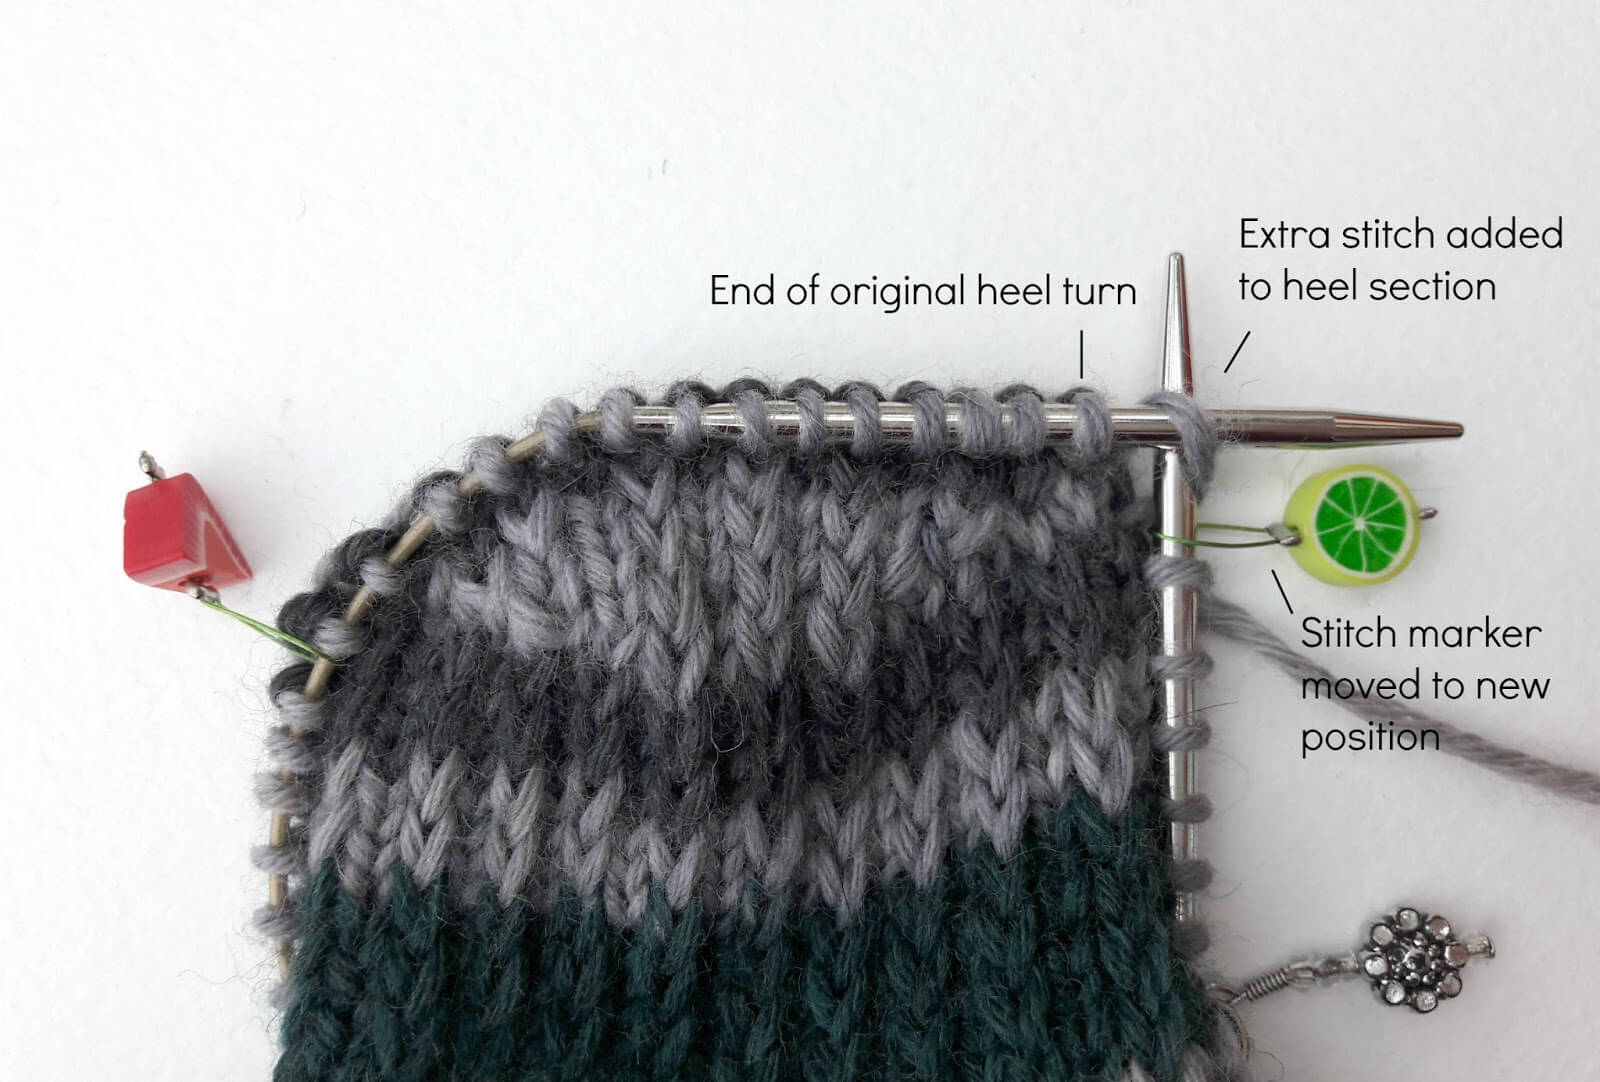
Keeping in pattern with the rest of the heel turn stitches, either slip or knit the stitches across the heel. It should be easy enough now to see from your heel turn which stitch to do – the slipped stitches are raised and the knit stitches are lowered so you just work whichever stitch follows the sequence as you work across to the next marker. Be careful not to pull the yarn too tightly across the slipped stitches. Take the marker off, knit or slip the next stitch, then place the marker back on again. The number of heel turn stitches will now have increased by two.
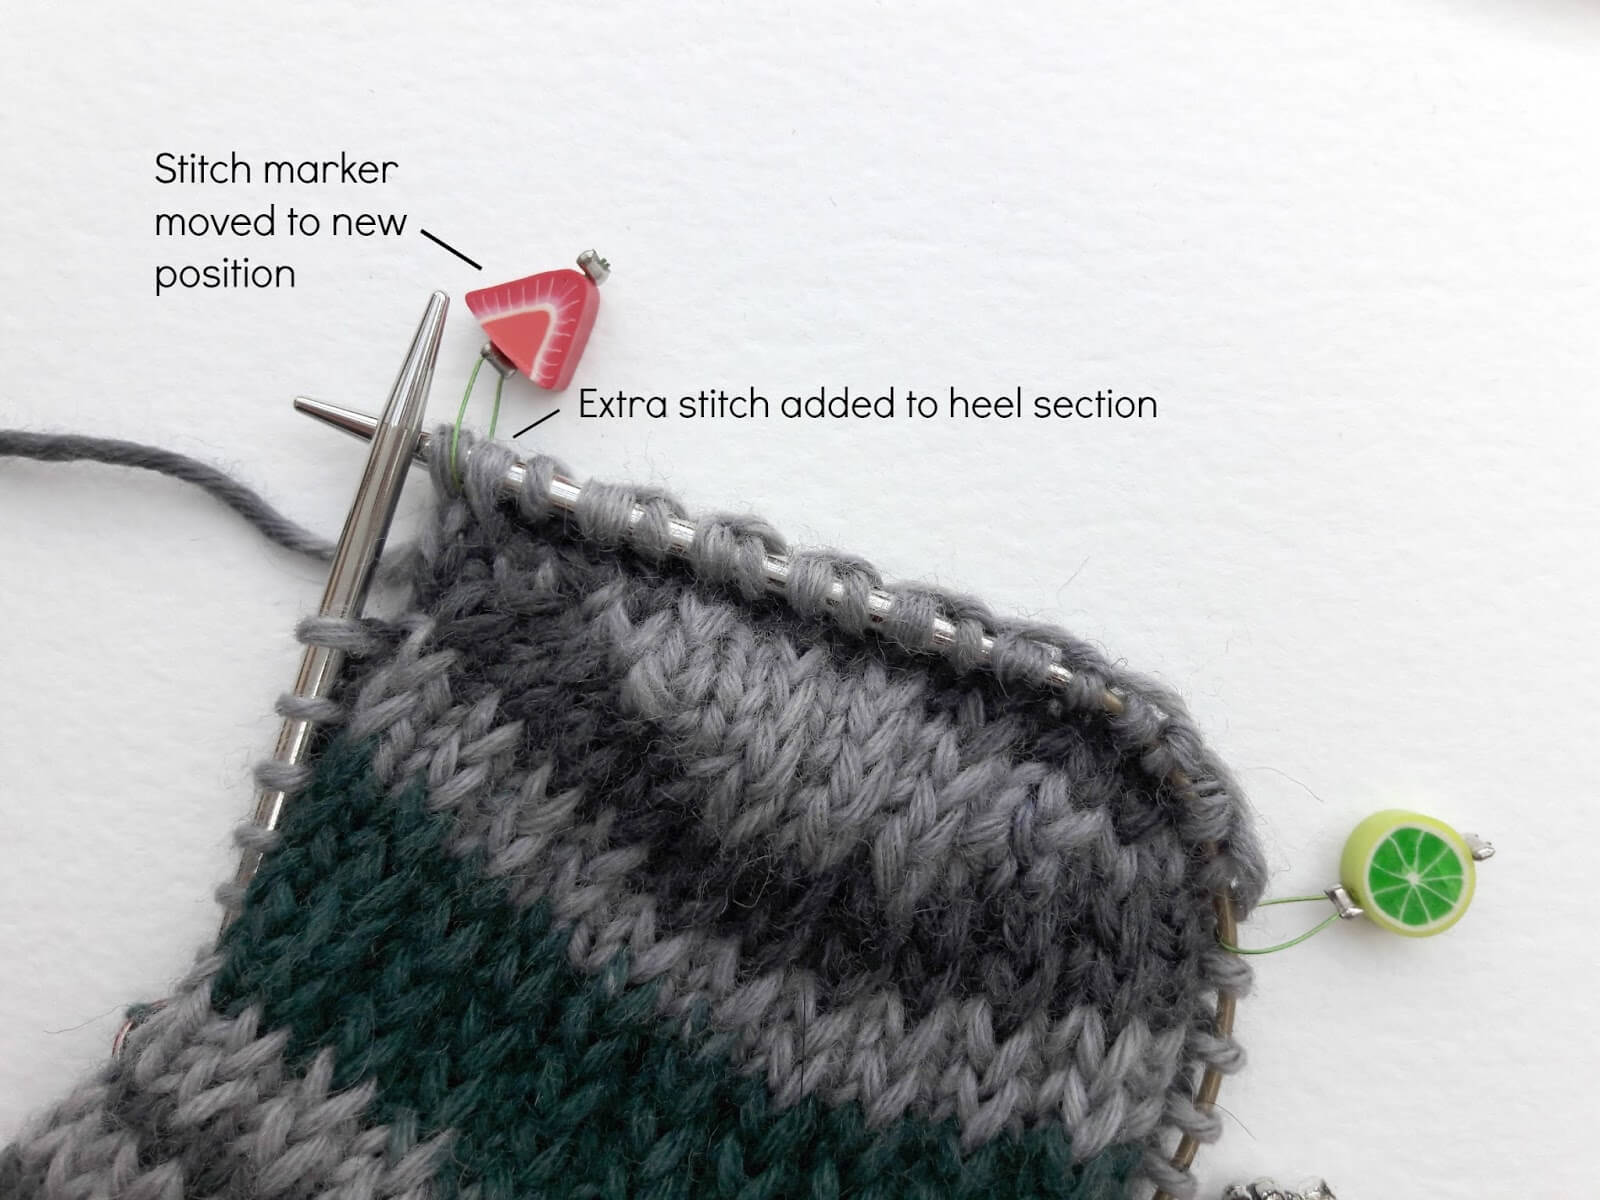
Knit back down to the first decrease marker, and work round 2 of the gusset decrease; that is knit each stitch of the round, slipping the markers as you come to them, until you are 3 stitches from the first marker.
Work round 3 of the gusset as per the pattern, slipping the markers at the heel off to add two more stitches to reinforced section, and then work round 2, knitting each stitch.
Continue in this way until your reinforced section is as wide as you want it to be. You will find that as you are increasing the size of the reinforced section, sometimes you will start with a knit stitch and sometimes with a slipped stitch – this is perfectly fine so don’t worry that you’ve done something out of sequence! You’ll also find that if you decide to increase the section to the whole width of the foot as I have done that you’ll need to do a bit of juggling with the stitch markers as you get closer to the gusset decrease markers. As long as you remember to keep decreasing on the heel side of your sock then it will be fine, and just keep counting the total number of stitches on your needle so that you know you’ve got the right number.
Here, I have worked half the stitches on my needle and you can see how the reinforced section has widened across the bottom of the foot.
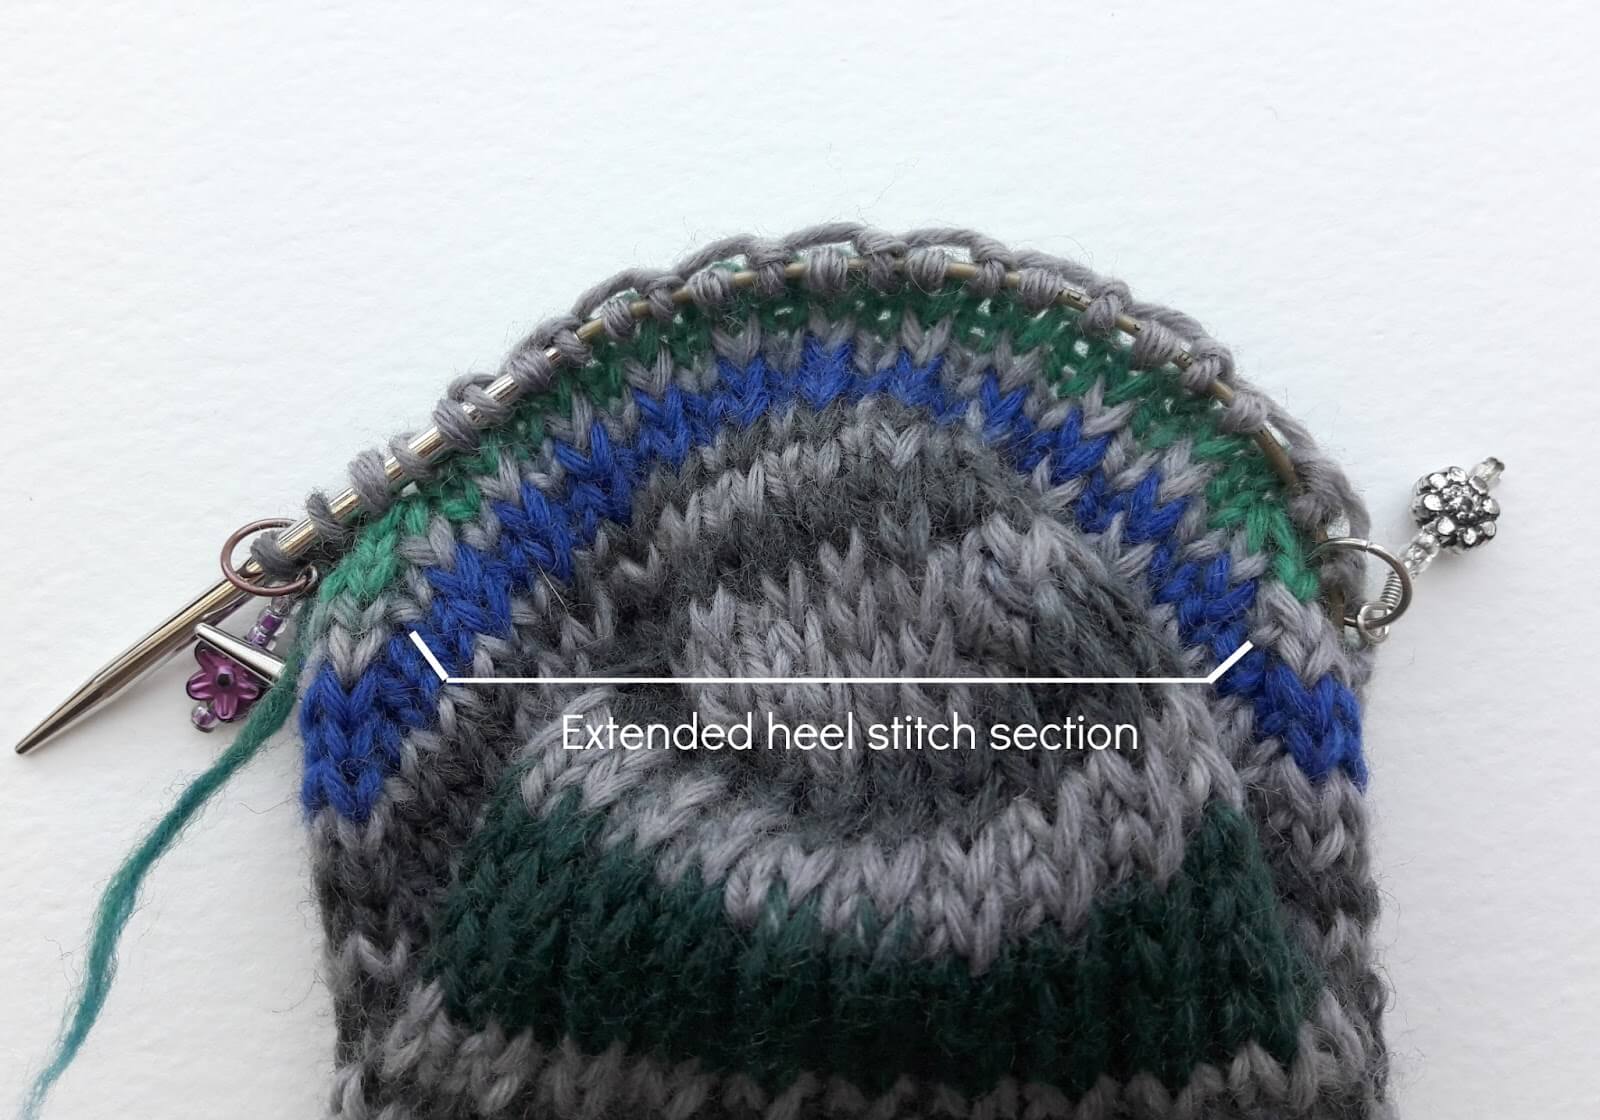
Once you have decreased to the original number stitches, you don’t need the heel markers any more, although it’s a good idea to leave the two gusset decrease markers in so that you can see where your reinforced section starts. You are going to knit straight now, working the heel stitch on the sole section of every other round as you knit your foot to the size that you need.
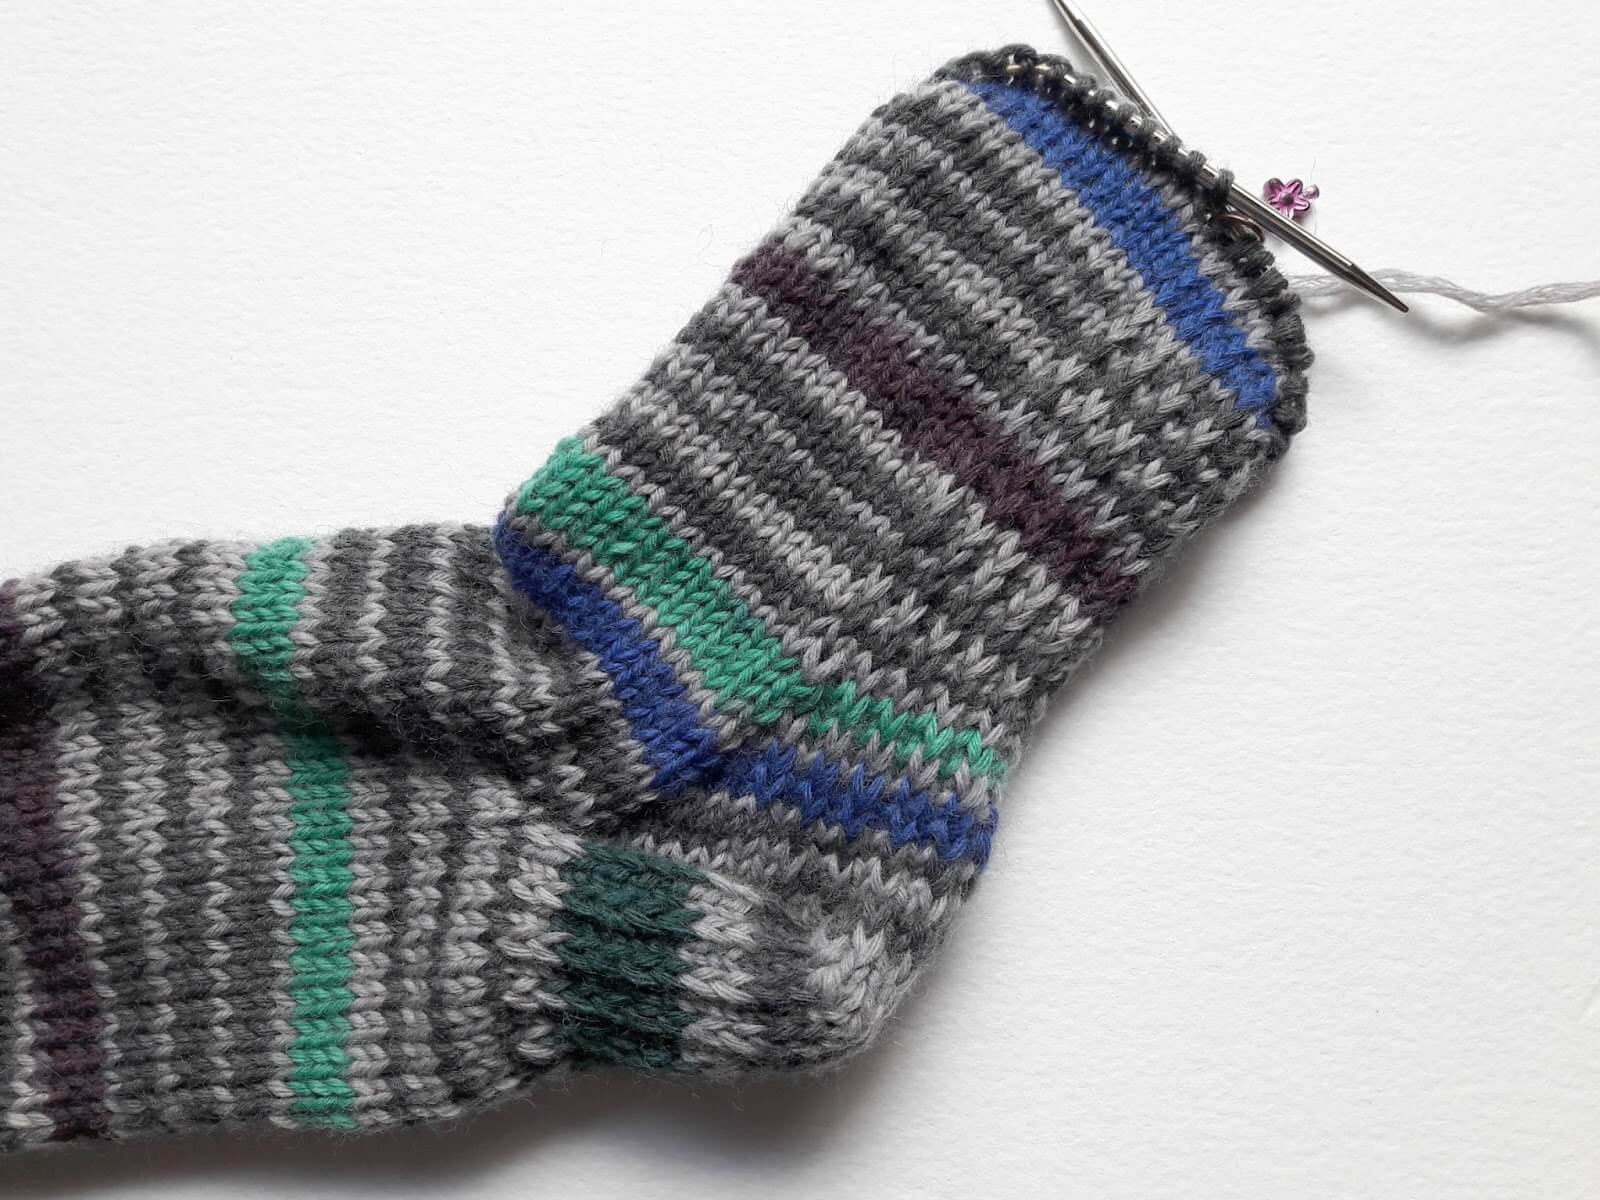
When you reach the toes, it’s up to you whether you want to extend the heel stitch across the top of the foot or just keep it underneath. If you want to extend it, all you need to do is start the toes in the usual way, so work on half the stitches for the top of the foot and half for the bottom. There’s more information on creating toes in this Sockalong tutorial. You are going to follow round 1, so knit 1, SSK to create the first decrease, then k1, slip 1 across the stitches (this keeps the heel stitch in line with the bottom of the foot, but it really doesn’t matter if you choose to slip 1, k1 instead) until 3 stitches before the end of the foot half, when you will make a K2tog decrease, K1. Repeat for the bottom of the foot.
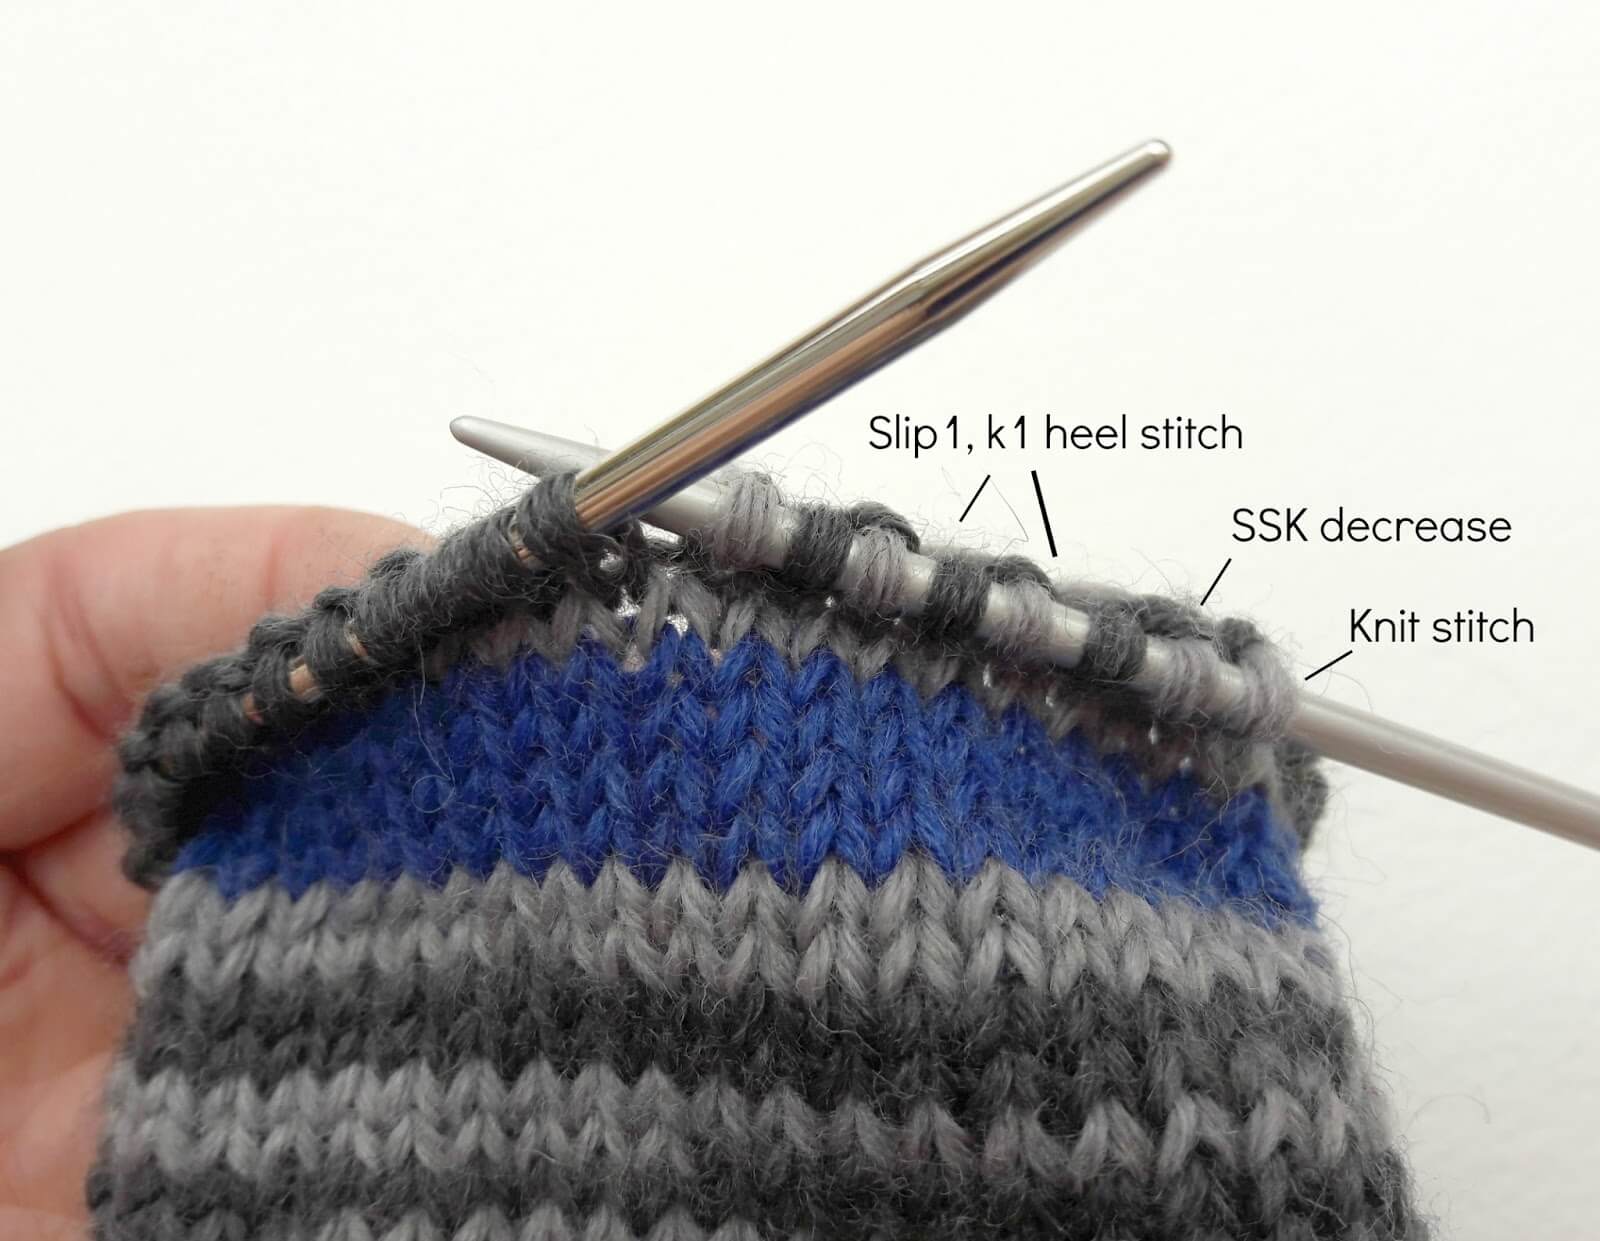
Knit across all the stitches for round 2 of the toe decreases, then work round 3 remembering to line up your knit and slip stitches. I only have a small toe decrease section on this DK sock but if you’re using 4ply or 6ply, yours will be much bigger. You can see how the ridges of the slipped stitches are lining up and this will make the toe section much more hardwearing. You can use this technique even if you don’t want to continue the heel stitch underneath the foot – I often use it for my uncle’s socks and have used it on mine before now as I’ve got pokey toes J.
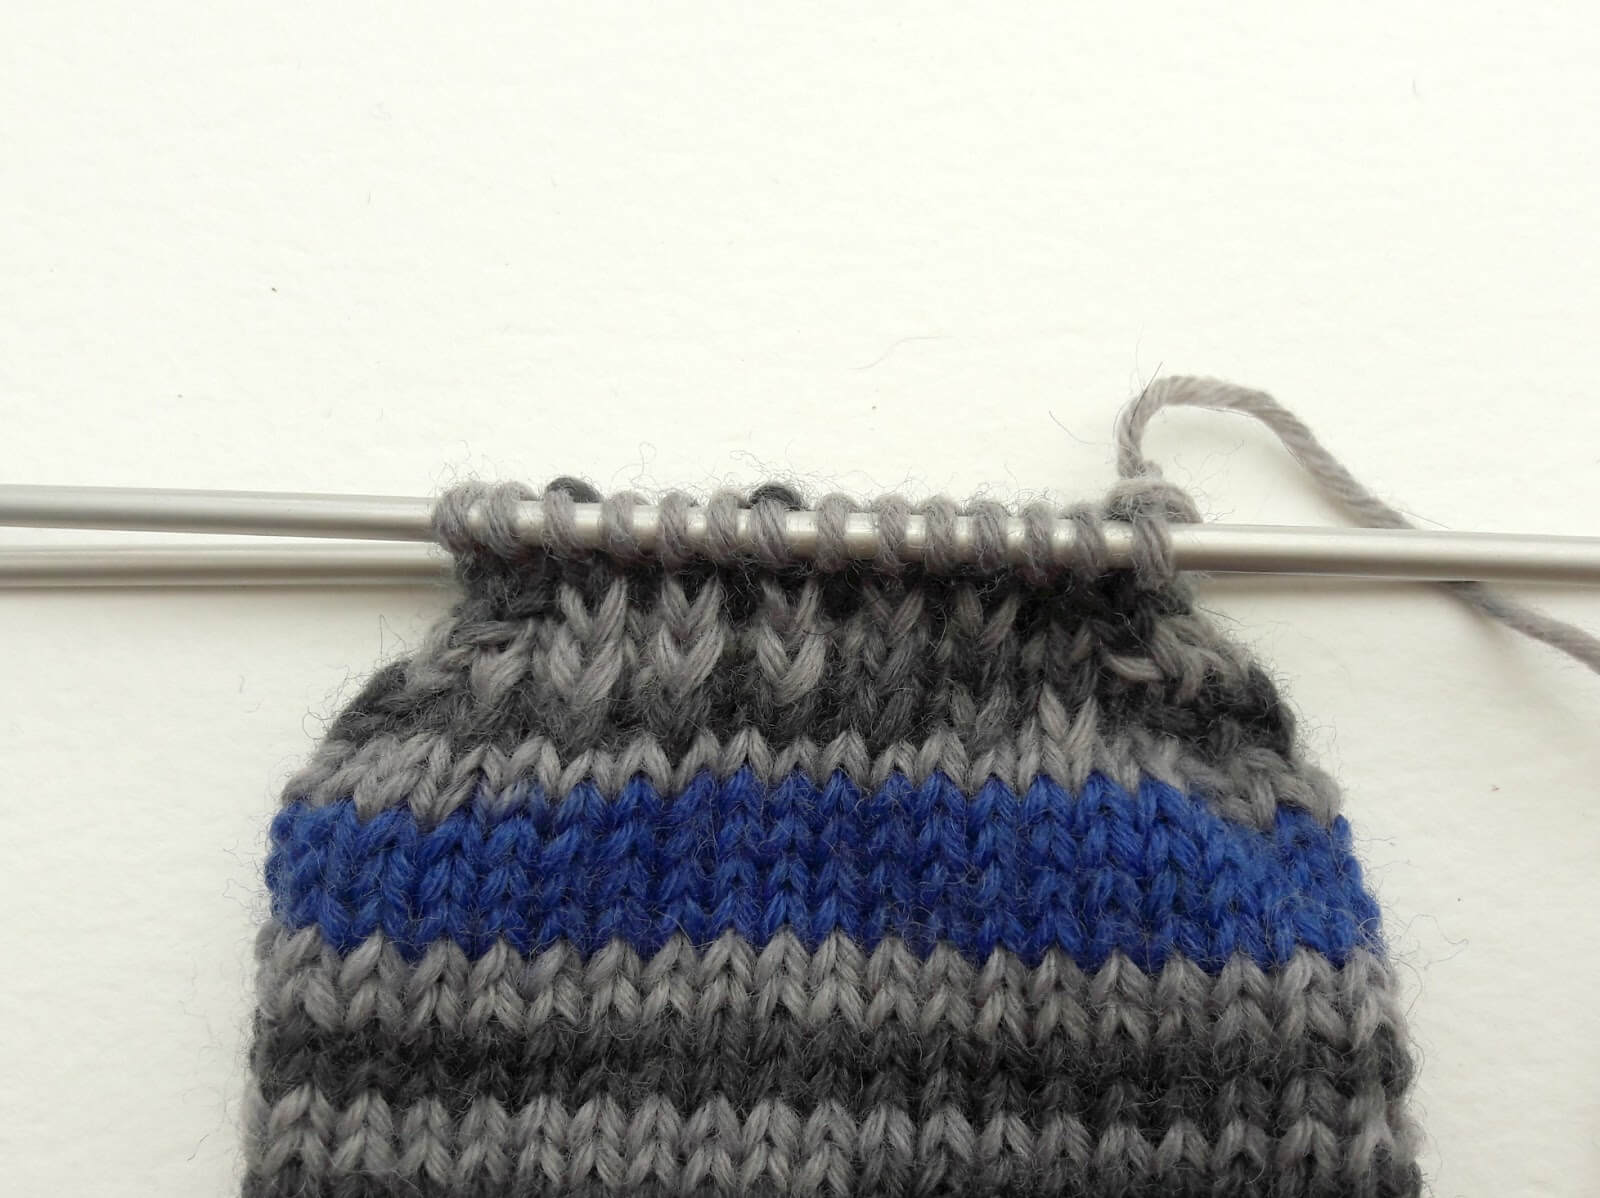
So there we are. Reinforced sole and toes – all you need to do now is graft your toe ends together and you’re good to go.
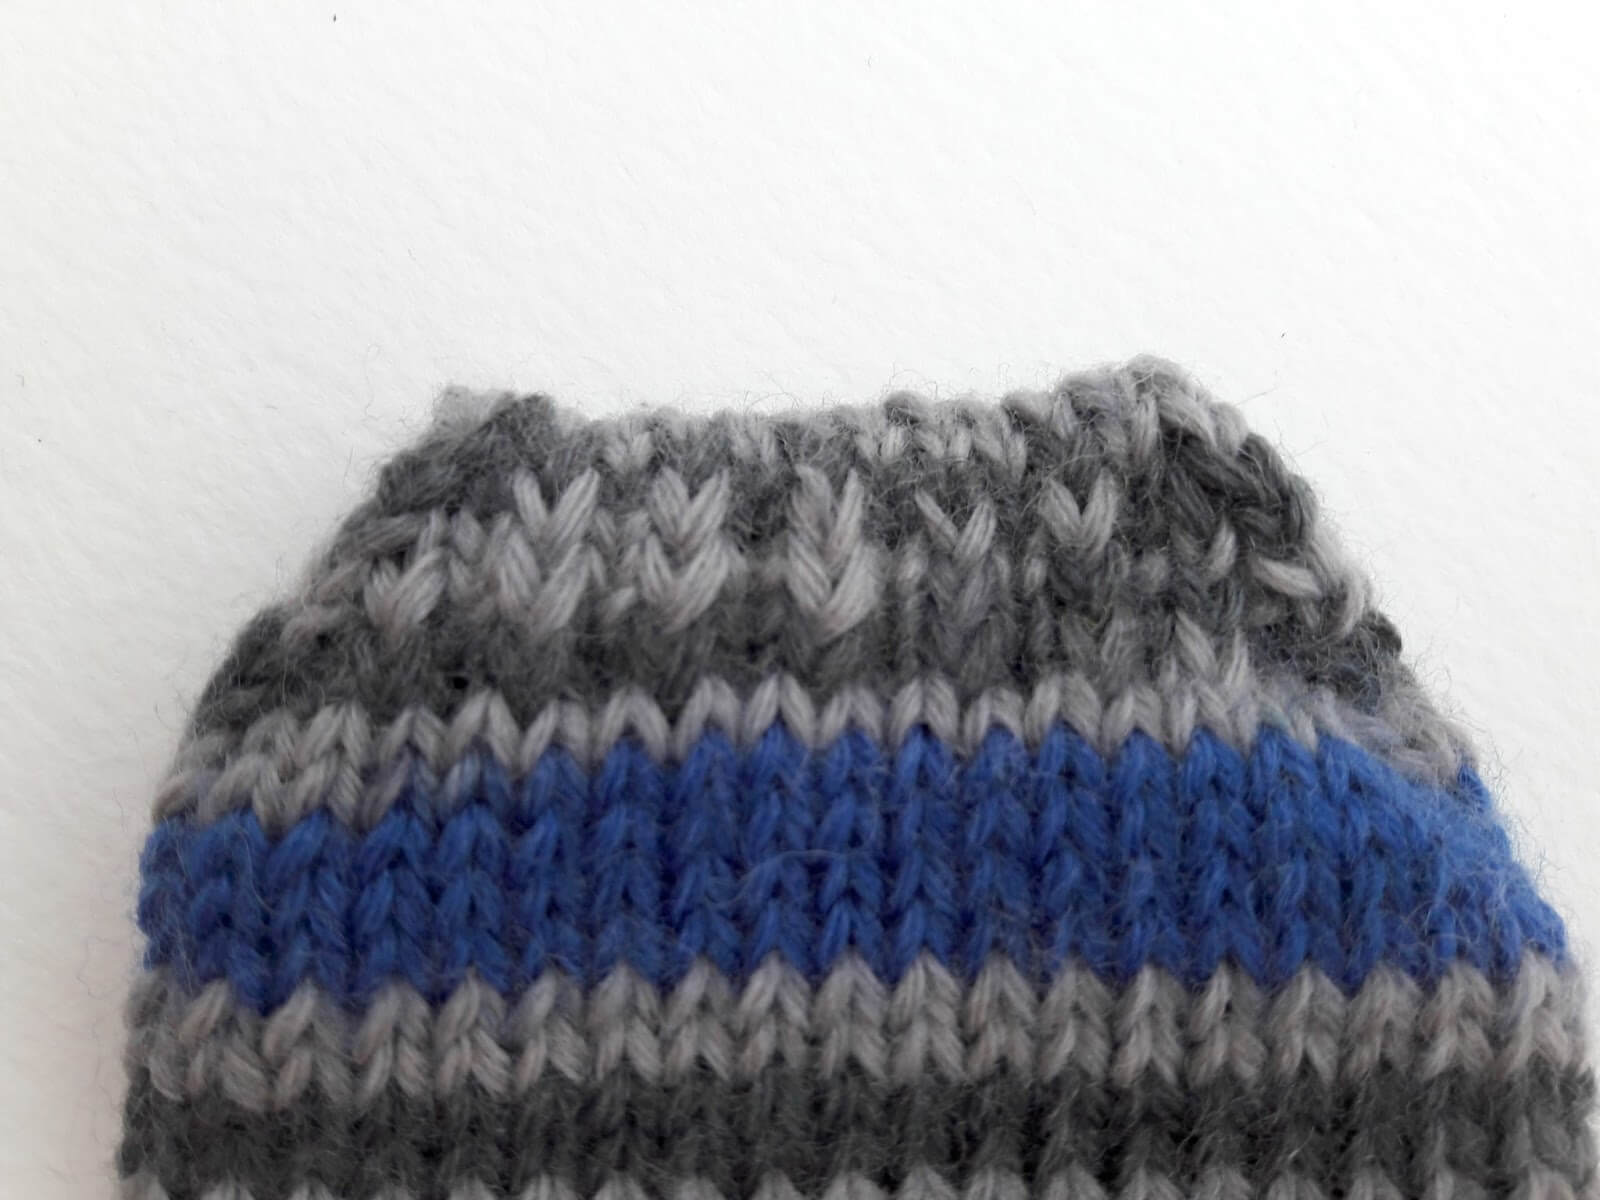
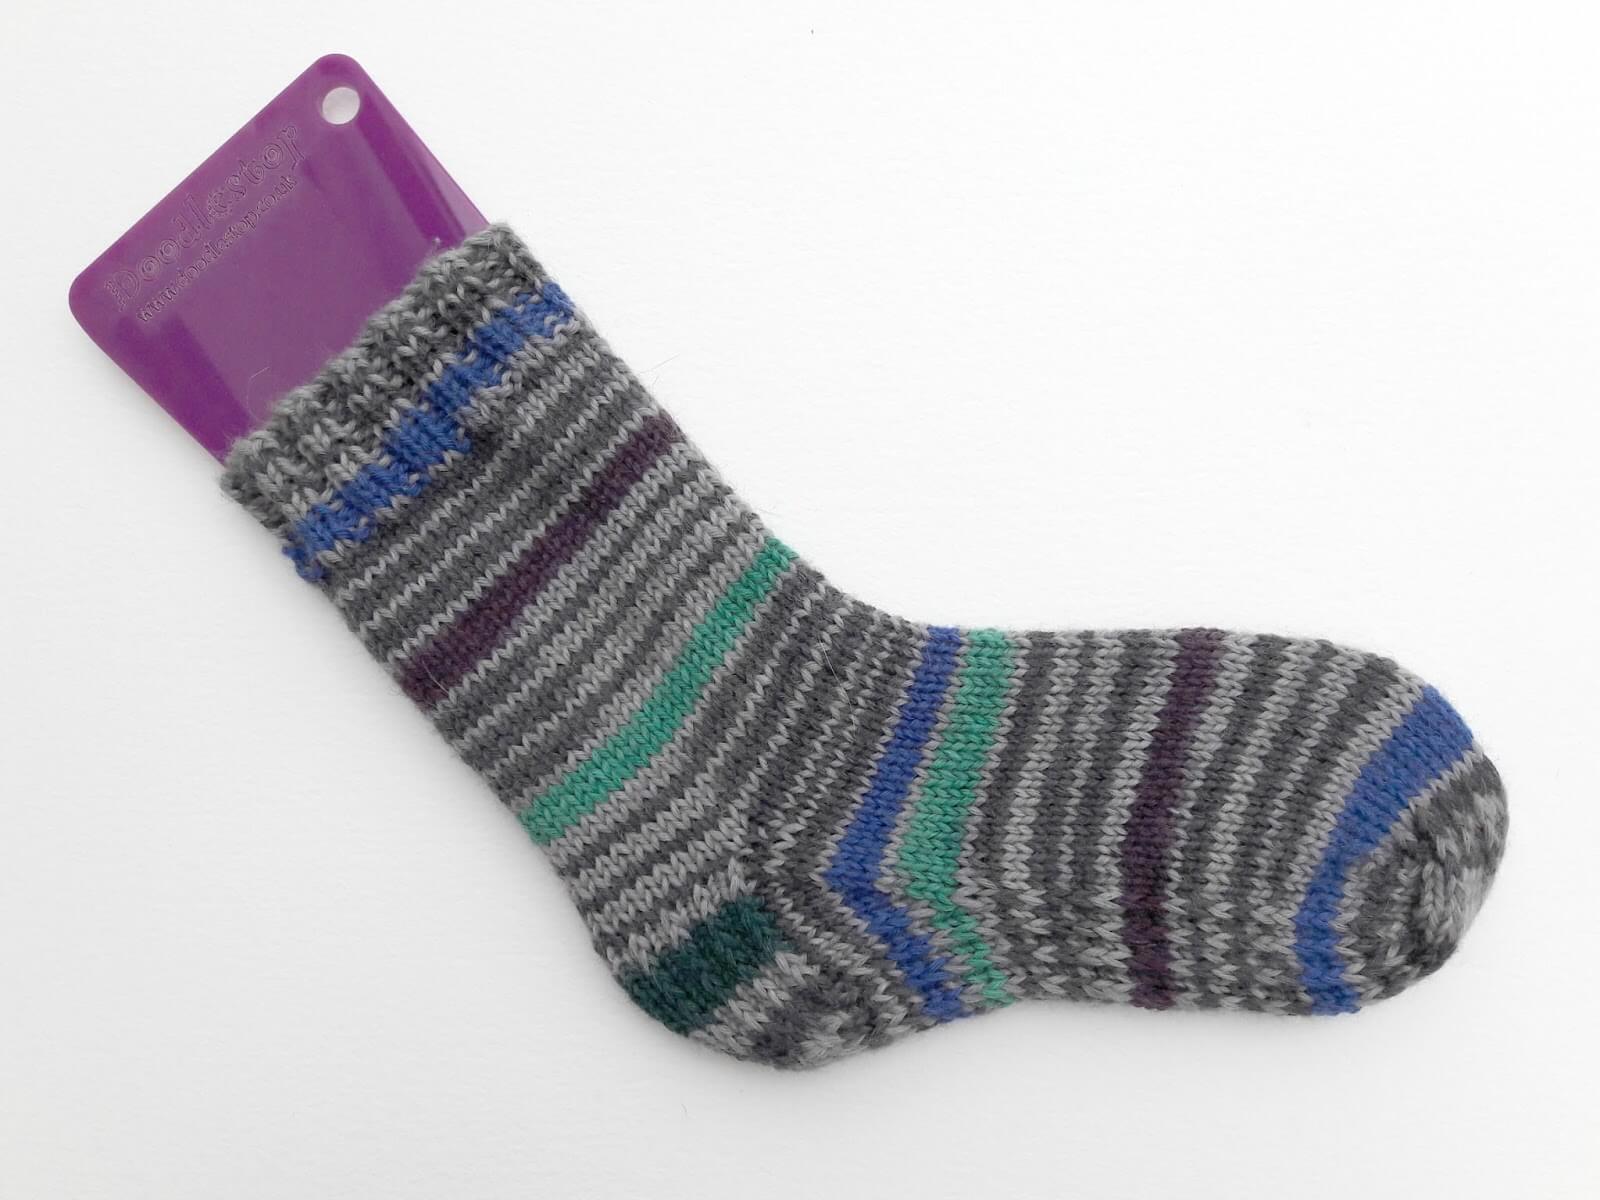
This is what the whole of the bottom of the foot looks like once you’ve finished …
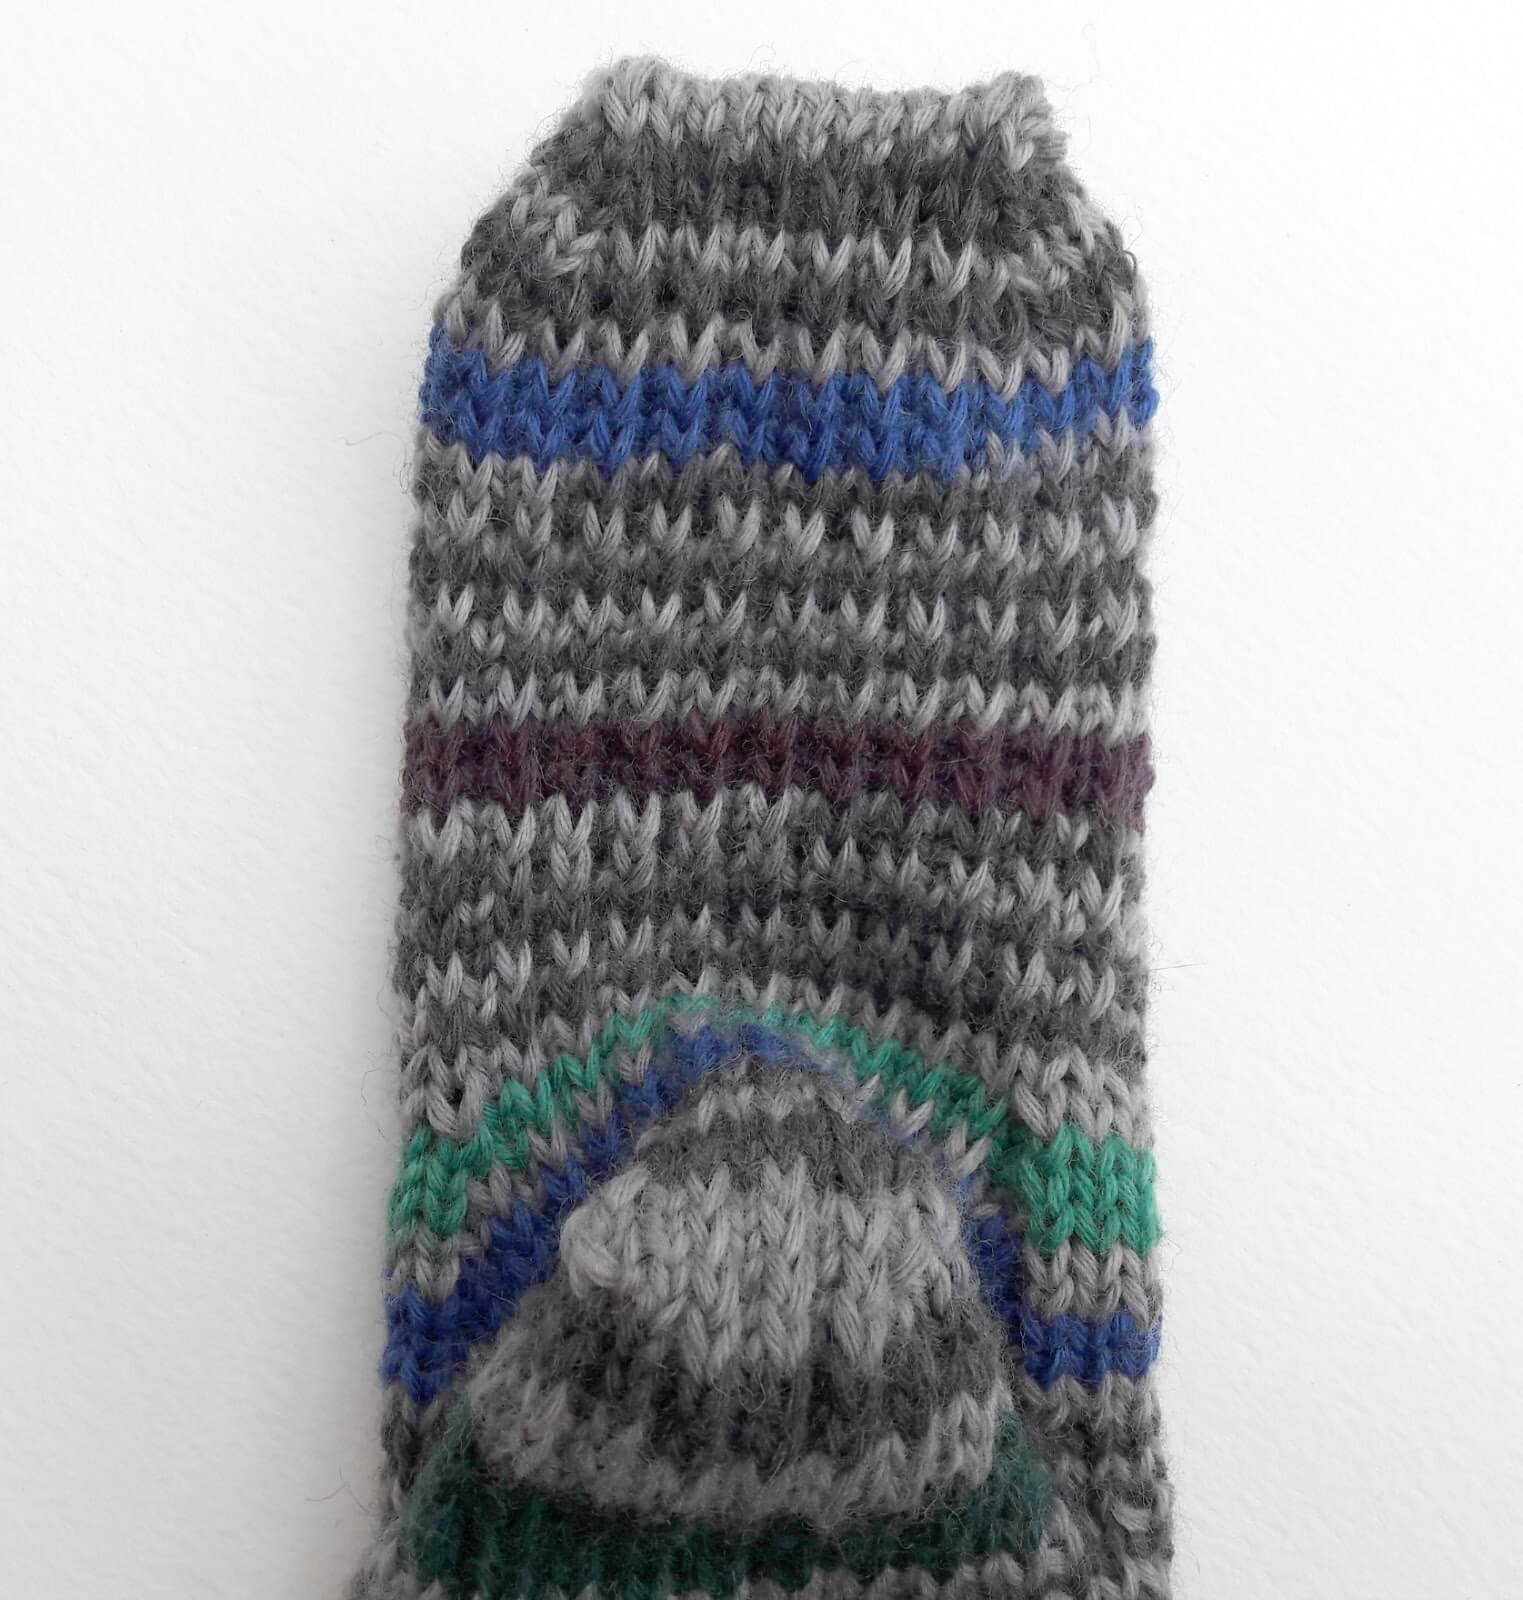
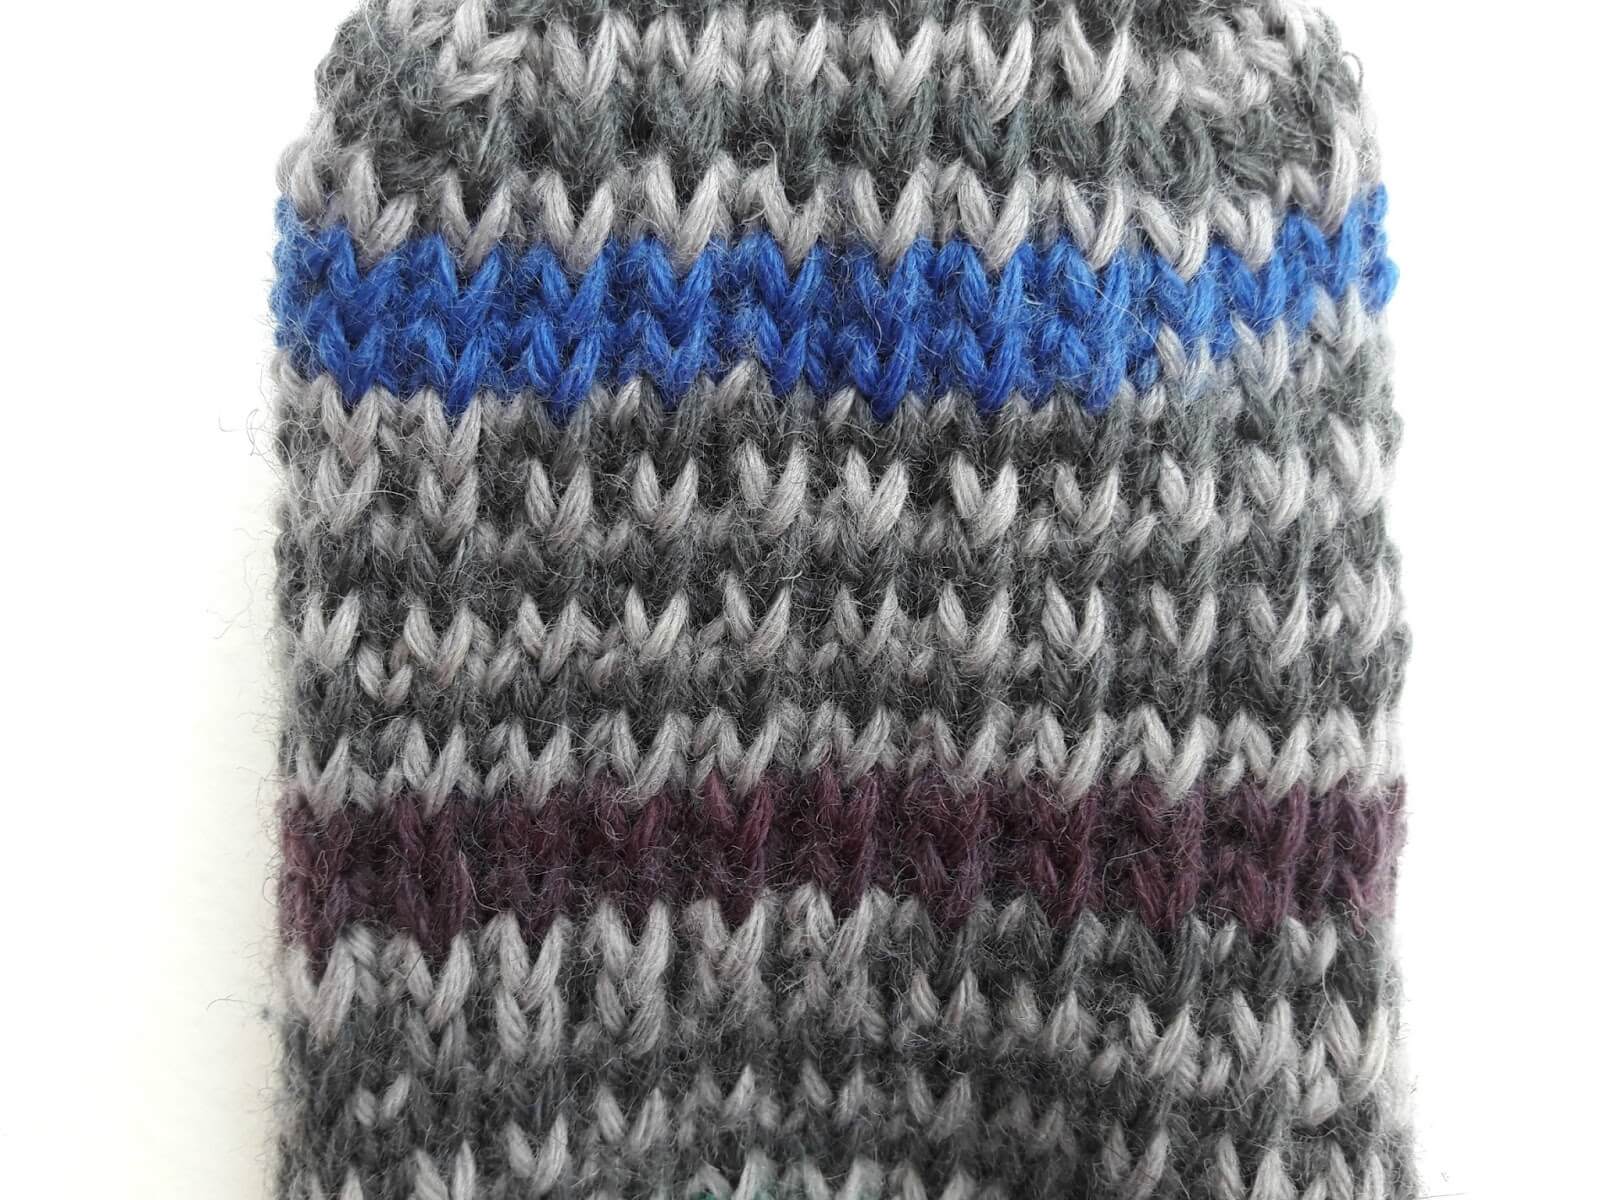
and this is what your sock will look like on the inside. Lots of cushiony loveliness to keep your feet comfortable and hopefully stop your socks wearing out quite so quickly!
Do let me know how you get on if you try this out – and here’s to lots of long-lasting socks! 🙂
This tutorial is free and will always remain so, but if you have enjoyed using it and would like to buy me a brew, it will be much appreciated! You can find the donation button on the sidebar on the left hand side. Thank you! xx











I very much appreciate your generosity in providing your excellent tutorials. It must be extremely time-consuming preparing the tutorials, and it is very kind of you to share them. I made my first pair of socks using your excellent tutorial, and I'm looking forward to trying your latest tutorial.
It does take a fair amount of time, yes! But having said that, it's brilliant to be able to share the tutorials and add something else to the general knowledge pool – after all, that's how we all learn! 🙂 xx
I wholeheartedly agree with Anon above. Made my first pair of socks for my daughter's Christmas and they are having their first outing today! Already have a request for pair with reinforced foot so thank you for this extra tutorial. 🙂 X
Thanks for sharing the fantastic tutorial. Those socks look super comfy, I must say!
They are, Helen! 🙂 xx
So happy to find this, as I get holes quickly in the heel turn and ball of foot. Wonderful directions!
Thank you, I'm so glad that you've found it useful! xx
After a quick look at the tutorial, these looks like top down socks, would this method work on toe up socks?
Yes, I don't see why not. You're only using heel stitch and that can be worked either top down or toe up xx
Fantastic tutorial! I noticed that you didn't mention anything about gauge; do you need to make adjustments due to the fact that fabric worked in heel stitch is narrower than one worked in stockinette?
Hi! I found that as long as you don't pull the yarn tight behind the slipped stitch then it doesn't make a significant difference to the size of the sock – you have to make a conscious effort not to do that and to almost knit in what you feel would be too loose a stitch but if you are worried that it will still work out too tight, there's no reason why you couldn't decrease to a larger number than that which you cast on to compensate 🙂 xx
Hi again! Just wanted to let you know that I finished my socks with padded soles based on your tutorial. I modified your technique by working toe-up rather than top-down, and I added short rows on the sole to compensate for the shorter row gauge of heel stitch relative to stockinette.
I posted photos on Ravelry and also mentioned and linked to your page: ravel.me/lisajean1015/vswgcoh2. Thanks for sharing your expertise on your blog and for helping me with my project!
That's brilliant, thank you very much! Your socks are so pretty, that's really lovely yarn you've used, and I'm so glad that the tutorial was helpful xx
Thank you so much for all the work you put into this! It's exactly what I was looking for.
You're very welcome! 🙂 xx
Could I use a larger size needle to compensate for the slipped stitches so as to keep the gauge the same wherever I use the reinforced sts.
Yes, why not try it? I found that I was fine just keeping the yarn a bit looser but if you think you might forget then the larger needle will do the same job. Do let me know how you get on!
Once all the stitches are going in the round again, and you have all reinforcement stitches you want, are you working one row sl1 one row k1 every other row right to the toe?
Yes, that’s right. Basically, you’re knitting a giant heel flap on the bottom of your sock so just be careful with your yarn as if you pull it too tightly across the slip stitches, it’ll turn into a banana shape. The slip stitch fabric is slightly shorter than plain knit – I talk about it in my Easy Mosaic Socks tutorial as that’s the same thing but with the slip stitches across the top of the foot 🙂 xx
Hi there – this technique looks as though it would help save my socks!
I would like to download these instructions to my laptop, and cannot manage to cut and paste any part of it, nor do I see a print-friendly link anywhere on the page; do you have any suggestions as to how I (technologically challenged person) can keep this handy for when my internet cuts out?
Hi Lynn, I didn’t create a download PDF for this tutorial and it’s not possible to cut and paste from my blog so the best I can suggest is that you print the screen for the sections that you think would be most useful. It’s a really easy technique to get the hang of so I don’t think you’ll need instructions after the first time you’ve tried it 🙂 xx
Hi Christine. Thanks so much for this tutorial. I am a very aged knitter with bad arthritis in two fingers in each hand. I now have to knit socks on two Straights and stitch up the seam – no prob, its nearly invisible. My grandson loves his 4 ply socks so much, but would love a pair for under his work boots. So I’m going to try this slip st. pattern in 4 ply and hope it gives the extra ‘wearability’ for under boots. Thank you so much. Carole. PS He’s just ordered a new pair of boots from the States at the cost of a small car!!!
I’m sorry to hear about your arthritis, Carole, but I’m glad you are still able to knit. I wonder if knitting your grandson’s socks in DK (8ply) sock yarn on bigger needles would help your hands? The socks will knit up faster and be thicker in his boots too. Postage costs are so expensive, aren’t they – they must be good boots! 🙂 xx
Thank you so much, i seem to spend more time darning my socks tham knitting new ones at the moment and dont always loke the feel of the darned bits so am definitely going to give this method a try for my next pair!
I hope it works very well for you! 🙂 xx
Thank you so much for this tutorial! I have lost count of how many pairs of socks I have knit since I first read this last year! I knit socks toe up, two at a time, and I keep tweaking my technique to get the transition from sole, up the heel cup, (I use a short row technique) and up the heel. I even slip the stitches on my gussets! They do seem to be a bit more comfortable (and warmer), and it’s a fun technique! Thank you!
I’m really glad it’s helped you! 🙂 xx
Thank you. I have been searching for an (easy) way to reinforce the soles of my husband’s socks. I am finding though that the rows of my soles knit up narrower than the top part of the sock, even though I knit the sole as loosely as I can, in that, knitting in the round, the top part of the sock ends up longer than the sole, so when ready to reduce for the toes, the top and bottom of the socks are not aligned. Sorry- if I am not explaining this correctly. I have read somewhere that some knitters will periodically add short rows to the sole to compensate for this discrepancy, but, I am not sure how to do that. I will experiment with using larger needles for the soles and smaller needles for the sock tops to see if this may help even out the top and soles. Can you offer any other advice???
Yes, that can happen if you work the heel stitch on the sole of the foot – you end up with a banana on your needles! Slipped stitch fabric comes out shorter than “usual” knitted fabric because of the way the slipped stitches pull the fabric, so the way that I compensated for that was making sure that I was really careful about leaving the yarn loose across the back of the slipped stitches. It feels like your fabric is going to be way too loose to be any good, but what happens is that it allows you to stretch the sole fabric more so it evens out. Have a look at this blog post for the Easy Mosaic Socks which potentially does the same thing but the other way round as you have the slipped stitch fabric on the top of the foot, not the sole. I hope that helps! 🙂 xx
Thanks for your reply. I thought I had left more slack with my slipped stitches, but, obviously not. Initially, when I read your advice about leaving slack on the slipped stitches, I thought it was to ensure that the sole did not pull in too much from the sides (versus the length) so I was more horizontally focussed. I will unravel and start again. Thank goodness for using lifelines. LOL.
Oh, lifelines are amazing things! 🙂 I hope you manage to get it sorted! xx
Clever!
I’m glad you think so – and it really works, too! 🙂